Jim...great tutorial and examples! Thanks for sharing.
Eliminating Distracting Elements: Creative Use Of Depth Of Field
One of the best ways of eliminating distracting elements behind a subject is to throw them out of focus. When you first study the fundamentals of photography, you learn that a large lens aperture like f/2.8 or f/4 produces shallow depth of field—meaning the background is more blurred, like in (#1)—and a small lens aperture such as f/22 or f/32 increases depth of field so the elements in the background are sharper and more defined, as in (#2). This is true, but it’s not the whole story. In order to use depth of field in such a way that you can eliminate distracting objects behind a subject, you have to understand that there are four factors that influence depth of field.

All Photos © Jim Zuckerman

1. Lens aperture: Large apertures mean less depth of field and small apertures produce more depth of field.
2. Focal length of the lens: Wide angle lenses have much more depth of field than telephoto lenses even if they are used at the same lens aperture.
3. The distance from the subject to the camera: The closer the camera is to the foreground, the less depth of field you have. Conversely, as you move back from the subject, you gain depth of field.
4. The distance from the subject to the background: The further away the subject is from the background, the more the background is out of focus. As the subject gets close to the background, the more it is defined.
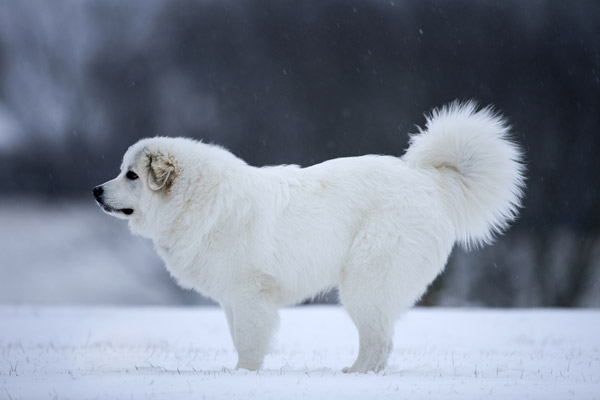
All four of these factors work together every time you take a picture. For example, when I photographed Rexie, my Great Pyrenees, last winter (#3), I wanted the entire background out of focus. I didn’t want any of the trees or fences in the background to be defined because I felt they would detract from the powerful stance of the dog. To completely blur out the background, I used three of the four depth of field factors in my favor: I shot this with a 500mm lens, I used the largest aperture, which is f/4, and the background was quite a distance away. Rexie wasn’t close to me—I’d say he was about 80 ft away—but three out of four factors produced a portrait with a complementary and unobtrusive background.
By comparison, I took (#4) with a 24–105mm lens set at 82mm. Right off the bat this would produce more depth of field than I had with the 500mm telephoto. Next, the background trees were fairly close to Rexie, and the lens aperture was f/8. Here again are three factors that meant the depth of field would be significantly more than in (#3) and as you can see, the background keeps pulling your eye away from my subject.

The two outdoor portraits of a little girl illustrate a similar point. I like the inclusion of the flowers in (#5) but the branches in the background are distracting. This is a good example of eliminating elements in the background that are less than ideal. I took the picture with a 70mm focal length and f/11. In (#6) I made three changes: I used a larger lens aperture of f/3.2, I moved closer, and I zoomed the lens to 200mm. Again, three out of four depth of field factors worked in my favor to make the background go completely out of focus.
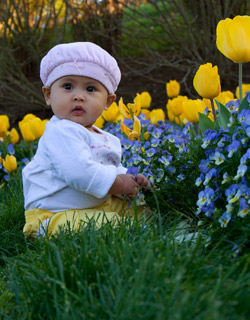

Would only one of the factors have done the same thing? For example, if I only opened the lens to f/3.2? No, I would not have gotten such an out of focus, complementary background.
Look at the background behind the roseate spoonbill in (#7). It is visually annoying, to be honest. The branches are too defined and they divert our attention from the bird. Why did this happen? I used a 500mm lens and my lens aperture, while not wide open, was fairly large at f/7.1. That’s only two factors. I wasn’t physically close to the bird and the background was only 20-25 ft away. This wasn’t far enough to be out of focus. I only had two depth of field factors working for me in this case, and that wasn’t enough.

The clouded leopard I photographed at the Nashville zoo (#8), was taken with the same 500mm lens, and the aperture was set to f/4. The background was approximately the same distance from the cat as the mangrove trees were from the roseate spoonbill. The reason why the background is so much more out of focus in the zoo is because the distance from the camera to the subject was much closer. I was about 15 ft from the cat, but when I shot the bird from a boat I was about 40 ft distant. Again, I had three depth of field factors working for me: the long telephoto, the large lens aperture, and the close proximity to the leopard.

When a subject is close to the background you can’t eliminate it by manipulating depth of field. You have to use another method, whether it is digital (such as Photoshop) or something else. In the picture of a caterpillar photographed in front of a plant (#9), the subject was only inches away from the background leaves and therefore they are clearly defined. In addition, because I wanted to use a small aperture to capture enough depth of field on the insect, there was no way I could blur the leaves. Therefore, I used a technique that is very effective when photographing small subjects. I make a large print (13x19” or even larger) of out of focus foliage. I photograph a plant or tree in muted light so the soft green colors don’t have a lot of harsh contrast. I then mount the print on a piece of foam core, and then when I shoot a subject like this caterpillar, I place the mounted print behind it. When I close the lens aperture down to gain depth of field on the insect, the background stays beautifully out of focus (#10), and therefore very complementary and non-distracting. Any distracting elements in the background are instantly eliminated.

- Log in or register to post comments


