Datacolor’s Spyder3Express And Spyder3Studio SR; Calibration Or Calibration & Profiles Plus Page 2
 |
|
|
 |
|
|
 |
|
|
The calibration process with the Elite takes longer than with the Express because it’s reading many more color samples during the process and creating a more accurate display profile for your system, but the end result is a slightly better profile with more shadow and highlight details. You’ll see the same before and after screens as shown in #6 and #7. By clicking on the images, you can zoom in for a better look. I like to use the upper left image to check the color and grayscale ramps (#13). If you leave the Spyder plugged in, you can take advantage of ambient light adjustments—every few minutes the Spyder will do a quick measurement of the ambient light in your workspace and adjust the brightness of the monitor to give you a consistent light level on the display.
 |
|
|
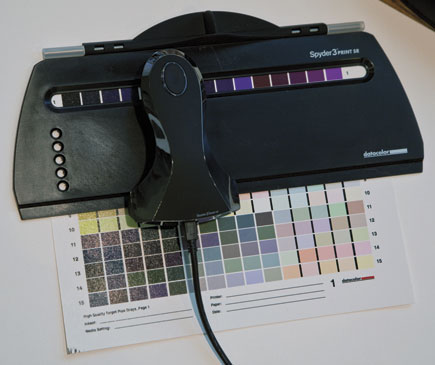
If you’ve gone for the Studio SR, you’re probably most interested in building printer profiles. The Spyder3Print SR spectrocolorimeter (#14) reads charts of varying numbers of color samples to measure the difference between specific color values and what your printer is capable of reproducing. From these differences, an ICC profile is built that tells Photoshop how to translate from the color on your screen to the matching color on your printer.
 |
|
|
The Spyder3Print SR software looks very similar to the monitor calibration software, so moving from one to another is simple. I do prefer the method X-Rite uses for the i1 and ColorMunki of having both options in the same program, but that’s a minor point.
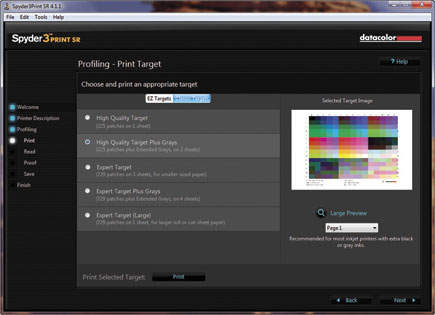
You’ll start by selecting the option you want (#15)—Datacolor has a great tutorial built into the program to learn about color management. If you’re new to the process, I recommend you take the time to go though this info; it’s good information and it will help you down the road.
 |
|
|
Once you start creating your profile, you can fill in the info on the printer, paper, and media selections (#16). This info will be printed on your charts, so you can easily go back to those charts at a later time and know exactly what they’re for. I’ll often do all of my chart prints at one time, let them dry overnight, and build the profiles the next day. Having the data printed on the page makes this easier to do.
 |
|
|
You have several chart options, from a 225-patch High Quality Target to a 729-patch Expert Target (#17). Both have the option to print an additional gray chart. I have very good luck with the 225-patch target and because I do quite a bit of black-and-white work, I also use the gray target. Older printers might benefit from using the 729-patch target, but the differences tend to be subtle, and you’ll use more paper to create them (along with more time to read).
 |
|
|
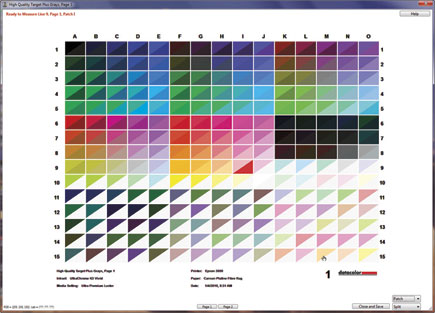
New to the latest version of Spyder3Print SR is the ability to read your targets in either patch or line mode. The included ruler is ideal for using the line mode, keeping the Spyder in the right location without worrying about positioning. As you read the chart, you’ll see an update on screen showing which patches you’ve read and what the actual color value created by the printer is compared to the base color (#18).
 |
|
|
The entire process of creating a chart (aside from the printing and drying) takes about 15 minutes with the High Quality Plus Grays option—similar to what it takes with the X-Rite ColorMunki. I find that the additional gray patches render a slightly better profile than the ColorMunki, but the differences are minor and best seen in a side-by-side comparison.
Conclusion
For the “get-it-done” type who is only interested in a quality monitor calibration, the Spyder3Express can’t be beat. At $89, it’s an excellent value that will give you immediate benefits in more accurate color reproduction. If you’re also interested in creating printer profiles, the Spyder3Studio SR, at $599, is a complete package for monitor and printer calibration. If you already have a monitor calibration device but you’re interested in adding printer profiling to your arsenal, you can get the Spyder3Print SR in a separate package for $339, making it the least expensive printer profiling option available.
“If you’re also interested in creating printer profiles for new papers, or fine-tuning your printed output, the Spyder3Studio SR is well worth a look.”
Requirements
• Windows XP, Vista, or Windows 7 (32-bit or 64-bit)
• Mac OS X 10.4 or later
• Available USB port
• 100MB disk space
For more information, contact Datacolor at: www.datacolor.com.
- Log in or register to post comments


