Aperture In Black And White; Conversion Strategies For Mac Users Page 2
6) To show you how radical a change these presets can make here's the image with a blue filter preset (top below) and a red filter preset (bottom below).
 |
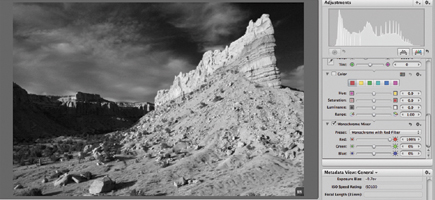 |
7) Here's the original in color and the converted image ready to be exported. To export go to File>Export>Export Version and then create or locate a folder to send the image.
 |
 |
8) This is the final image after work in Photoshop. I could
have added a color tone in Aperture using the Color Monochrome tool for an overall
colorization but I wanted to do a split-tone and had to work in Photoshop Layers
to get the control and selections I wanted. In brief, I first created a new
layer using an Overlay Blending mode, then filled the layer with 50 percent
gray, then did some judicious burning to alleviate the continuous tone in the
foreground and formation. I then used a hue/saturation layer to add the light
sepia tone, then erased the toning from the sky using a Layer Mask.
My approach is to use any conversion tool to create a foundation image, then
refine it later as I see fit. Aperture and its workflow setup makes for fast
and easy work in this regard.
 |
George Schaub teaches digital black and white printing at workshops and seminars, including the Santa Fe Photo Workshops, the Maine Photo Workshops, and the Palm Beach Photographic Centre. His next week-long workshop is at Santa Fe Photo Workshops (www.santafeworkshops.com) from February 24th through March 1st, 2008. Google the workshops for more information.
- Log in or register to post comments

