Adobe Photoshop Camera Raw Plug In
Easy, Direct And Speedy Access To Digital Camera Images

Adobe Photoshop Camera Raw Plug-In

The Adobe Photoshop Camera Raw plug-in, once installed, launches automatically when the File/Open command is applied to a raw or TIFF image file made by a supported camera stored on a drive or in a folder. A preview of the image is provided, as well as an optional RGB Histogram display overlay, both of which are interactive with adjustments applied through the use of the plug-in's slider controls.

Just a few years ago, when the digital camera was just beginning to catch on, image media storage capacity was very limited and expensive. To conserve this small capacity cameras were designed to output image files in lossy compressed JPEG file format so the user could record a greater numbers of images, although limited in quality, in one shooting session. As digital cameras have evolved rapidly, and their cost has come down relative to quality and resolution, the capacity of image file storage increased exponentially with a dramatic reduction in cost per megabyte of storage. Development in both camera and storage capacity now has made the use of JPEG compressed file format for camera output less of an advantage, and in terms of the lower level of image quality the cost of using JPEG is no longer a justifiable option.

The TIFF And Raw Advantage
The advantage of recording digital images in a lossless raw or TIFF format rather than JPEG is not just to avoid the file compression by throwing out some "redundant" image information. Compared to raw or TIFF file format storage, JPEG reduces the sensor capture's bit depth, which may be 10, 12, or even 16 bits per RGB channel, to 8 bits per RGB channel, or 24-bit color. In addition to throwing out supposed redundant information and much of the color variation captured by the sensor recorded as bit depth, the final insult with some cameras may be that the JPEG file output is also in sRGB color space, with its limited color gamut.

In other words, if you have invested in a higher-end prosumer or professional-level digital camera and want to advantage all of the camera's potential to reproduce high quality images, store the captures in raw or TIFF file format. The resulting TIFF or raw format files will contain all the image information captured by the sensor, and at the sensor's bit depth, as well as in the camera's color space with an accompanying profile describing that space.

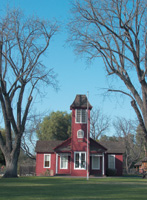
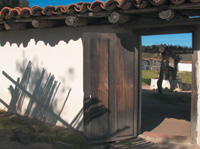
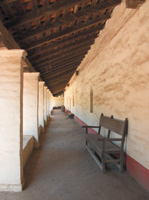
Subjects containing fine detail and gentle tone gradation, as well as bold and delicate colors, were first processed with the Adobe Photoshop Camera Raw plug-in then re-sized within Photoshop to 12x16" at 240dpi. When printed at that size the images were more than comparable to much higher resolution scans of 35mm film images I've recently made.
Photos © 2003, David B. Brooks, All Rights Reserved

Enter The Raw Plug-In
The purpose and function of the Adobe Photoshop Camera Raw plug-in is not just the convenience of automatically recognizing a particular camera's signature proprietary format, and then opening a window with a preview of its visual content in Photoshop's workspace. It is to provide the tools to adjust each dimension of image quality ideally applied to the full depth of the information before the file is transferred from its storage drive or folder to Photoshop's workspace. This is a profound advantage because making changes to brightness, contrast, and overall color to an image file that is in 24-bit mode can and often does exact the price of a reduction of information that is irretrievable. Making the same changes to a high-bit file usually avoids that cost, and results in a 24-bit RGB color image with superior color qualities, including more variations of hue and smoother tone gradations.

Camera Raw Features And Functions
Adobe's Camera Raw plug-in functions on principles similar to those involved in scanning and scanner drivers. Some of the tools and features are also similar but more specifically related to the characteristics of a digital camera. You launch Adobe's Camera Raw plug-in from within Photoshop 7.01 or Elements 2.0 by clicking on the File menu and then Open and using the Browser window to find and select a camera file from a drive or folder in which it is stored. If Photoshop recognizes the file to be a supported raw or TIFF camera file, the Camera Raw dialog box, which contains a low-resolution preview, is opened automatically. In the bar at the top of the Camera Raw window the camera brand and model which created the file is displayed, as well as the file name opened, followed by the camera setting, which can include film speed, shutter speed, aperture, and focal length.


One of the concerns some have that digital cameras have a limited exposure latitude was dispelled in my tests shooting subjects with a full subject brightness range from white in sunlight to almost black in shadow, which with the support of adjustment of the files using the Camera Raw plug-in resulted in images with good detail across the density range. This was particularly impressive to me as I have photographed this mission complex near my home in the past with both color transparency and black and white films and found it a challenge to obtain both good shadow and highlight detail.

To the left at the top of the window are three cursor icons that support magnifying the preview, moving the image portion displayed in the preview window, and an eyedropper to provide a read-out in RGB values. To the left under the preview window is a drop-down preview magnification selector and buttons to activate the Preview and an RGB Histogram window overlay. The remaining four drop-down selectors under the preview provide options to choose the color space for output, and below it the bit depth of output, with output size and resolution drop-down selectors.

Imaging Tools
The tools to adjust image quality characteristics previous to opening the full image in Photoshop are in a vertical column of sliders on the right side of the Camera Raw window. They are interactive with both the preview image and the Histogram when it is displayed. The first two sliders are directly related to the camera's White Balance setting as it affected capture. A drop down at the top defaults to "As Shot" (which is reflected in the Temperature and Tint settings in values provided by information recorded in the camera image file header), and provides the option of selecting specific color temperature values. The Temperature slider immediately below allows adjustment of the image color temperature in Kelvin degree increments.

The Tint slider supports adjustment of hue on the Red/Green color axis. The remaining sliders below, beginning with Exposure, which correlates to f/stop values, supports adjusting the placement of density values to a more ideal image appearance. Shadows allows gamut clipping to eliminate any waste of space--that which is devoid of image information--contained in what is displayed in the histogram at the lower density side. Brightness shifts the image density values up or down to lighten or darken the image. Contrast contracts or expands the image gamut to increase or decrease the space between value differences.


Saturation increases or decreases color intensity. Sharpness applies a filter function to enhance the space defining tone differences. Smoothness is intended to reduce noise generated by the selection of higher ISO speeds. All of these adjustments are reflected in interactive changes in the preview image. It also includes a vertical indicator when image data is pushed out of gamut, or clipped.


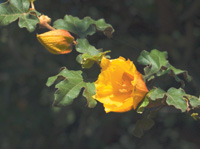
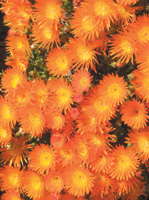
Springtime is doubly welcome encouraging photography outdoors and more significantly providing the colors of blooming flowers. The flowers also provide a particularly challenging test for color with fidelity recording, especially in their rich saturation and delicate differences in closely associated hues and tints. The Camera Raw plug-in made adjusting these color image attributes easy.

Test And Evaluation Based On Using The Camera Raw Plug-In
I chose to use a prosumer camera with exposure control to capture a set of subjects involving conditions that would provide a good basis to evaluate the Adobe Camera Raw plug-in. I was also supported in this effort with some early spring weather and obtained many more images than needed from several shooting trips at short distances from my home base. Upon returning from each outing I downloaded the full set of images directly to a new folder on my computer.

I chose a wide variety of subjects for color and contrast variation. In addition, as lighting conditions changed, I was afforded a range of effects, and at different times of day obtained variations in the white balance. I used the daylight setting rather than auto white balance. Also, in accordance with the manufacturer's recommendations, the capture options were set to low contrast and soft sharpness after selecting raw file output as well as maximum resolution and image size.

I began opening each image using the Camera Raw plug-in in Photoshop. I then proceeded to adjust each as needed to achieve my perception of how each subject should look on screen for eventual print output. With nearly every image recorded I found some adjustment to white balance and tint refined the images to more truly reflect the colors in the subject, effectively removing any influence of any warmth or coolness in the illumination. Of course if I had been shooting very early or very late in the day to capture a "sweet light" effect I then might as well have chosen to preserve or even exaggerate the warmness of the balance.

Then, using the Exposure, Shadows, Brightness, Contrast, and Saturation slider controls I made any additional adjustments, much as I would in a scanner's software driver based on the preview previous to making a final scan. After doing this with each image it would of course be opened in Photoshop. I then opened the Histogram display first to see if I had been able to accurately optimize the gamut for that image. If the image did not fill the gamut, I would then open Levels and refine the adjustment. Based on my perception of the image on screen in Photoshop I determined if any more "tweaking" would be necessary to achieve an ideal image adjustment. In most instances, some further refinement was possible using Curves to improve detail in highlights and/or shadows, and I found I could improve some subject colors using the selective color adjustment of the Hue/Saturation controls.

After opening and adjusting several more images with the Camera Raw plug-in, and based on my experience using Photoshop to adjust and refine photographic images, I came to the conclusion that the access convenience and conversion function of the Camera Raw plug-in are essential advantages, and that the White Balance/Tint adjustment tools are invaluable.

But judging by the amount I had to refine and tweak the image once finished in Camera Raw and opened in Photoshop, I might as well have used the program's more familiar and accurately refined tools. This can be accomplished without any loss of image information because Camera Raw provides the option of outputting at 16 bits per RGB channel, as well as standard RGB 8 bit per channel mode. Of course this option is only available to those using Photoshop 7.01 and not Elements 2.0 users, and may not be an advantageous strategy for those less experienced using Photoshop to do color correction.


Evaluation And Recommendation
For digital camera enthusiasts who are also Photoshop users, the Adobe Photoshop Camera Raw plug-in provides a direct and efficient, automatic access to raw and TIFF files created with a camera. It also provides a distinct advantage to adjust the effect of the camera's white balance adjustment, as well as quite easy adjustment to most dimensions of image quality, with some safety assured by the out-of-gamut warning provided by the plug-in's Histogram display. I would guess, particularly for digital camera users who have been saving their image files in JPEG format, they will likely find their camera records much more image quality than they have been used to. On the basis of just those attributes the Camera Raw plug-in is a very worthwhile investment at $99.

However, there are some attributes of the Camera Raw plug-in that I think could be improved. I believe that the fact that my results with it were less refined than making similar adjustments to images directly in Photoshop were largely due to the limited screen size of the Camera Raw plug-in window and its preview window. It would be a more effective tool if the plug-in window could be scaled to fill more of the screen at higher monitor resolution settings.

For more information and a complete list of camera models and proprietary raw formats supported go to www.adobe.com/products/photoshop/cameraraw.html. The plug-in is available as a single download from: www.adobe.com/store/products/master.jhtml?id=catPhotoshop.

The Olympus Camedia E-20N Digital SLR
The camera used to produce the images to evaluate the Adobe Photoshop Camera Raw plug-in was the Olympus E-20N, a true SLR 5.0-megapixel model.

Supported Cameras
Canon: EOS-1D, 1Ds, D60, D30; PowerShot 600, A5, A50, S30, S40, S45, G1, G2, G3, Pro70, Pro90 IS
Fujifilm: FinePix S2 Pro
Minolta: DiMAGE 5, DiMAGE 7, DiMAGE 7i, DiMAGE 7Hi
Nikon: D1, D1H, D1X, D100; Coolpix 5700, Coolpix 5000 (with firmware Version 1.7)
Olympus: E-10, E-20N; C-5050 Zoom

X