- REVIEWS
Camera Reviews 
More Reviews Mobile Reviews Photography Reviews - GALLERIES
- VIDEOS
- BUYER'S GUIDES
7 Hacks to Accelerate Your Photo-Editing Workflow (VIDEO)

Are you interested in editing your images faster without sacrificing the quality of your results? Most photographers would answer in the affirmative, and today's tutorial demonstrates a pro's top six tips for streamlining your everyday Lightroom workflow.
Johny J. Spencer is an accomplished nature and wildlife photographer who has been shooting for Australia's National Park Service for the past 20 years. He's equally adept behind the computer, and by following his advice you'll be able to quickly edit your images and get back out in the field with a camera doing what you love most.
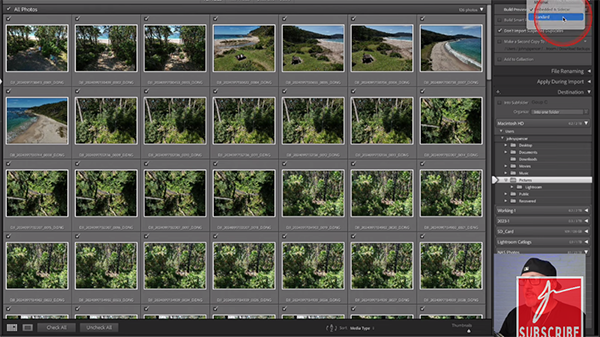
Spencer's first workflow hack begins in Lightroom's Import tab where he explains the benefits of "building previews in Standard." Doing this creates a small Jpeg version of the original image that doesn't take up much space on your drive. Then each time you click through your photos Lightroom doesn't have to load a higher resolution preview, because the small thumbnail was already created on import.
Moving on to the Develop module, Spencer demonstrates a trick "I use for 99% of my photos." You'll see why he also enables a few key settings, one of which is Lens Correction to quickly remove chromatic aberration. He also turns on Profile Corrections for reasons he explains. The only exception is when he's shooting with an ultra-wide lens and wants to retain the inherent distortion.
The next hack is to create a preset for whatever adjustments you made to a photo and Spencer demonstrates how to do this and select Add Preset on Import. This way you don't have to start from scratch every time this effect is what you want to accomplish. As he says, "this really speeds things up when you have numerous similar photos that you want to process fast."
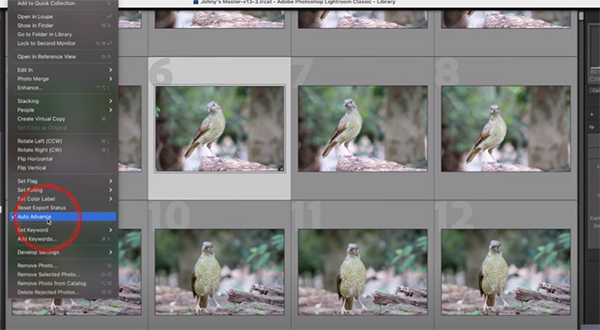
Turning on Auto Advance and using Flags properly is also something that Spencer strongly recommends for culling a bunch of photos and determining which ones you want to keep. Just keep fingers on the "X" and "P" keys and the task is accomplished in a hurry. You can confirm the choices you made with a quick glance at the film strip on the bottom of the screen.
At this point you're halfway through the video and there are three more hacks to go, so be sure to watch until the end. Then you'll want to update your Lightroom workflow so that it includes everything you just learned. Bottom line: You'll work faster and smarter from now on.
Spencer's instructional YouTube channel includes many more helpful post-processing videos that are just as simple and helpful as this one.
On a related note, don't miss the tutorial we featured last week with another image-editing expert who demonstrates what he says is the best way to import photographs into Lightroom so you stay organized and don't waste a lot of time.


![]()
Get the Latest Photo Tips, News & Reviews from Shutterbug!
| Camera Reviews Other Reviews | Mobile Reviews Photography Reviews Columns | News | Features | How-To | Resources |
 © 2025 Shutterbug
AVTech Media Americas Inc., USA
All rights reserved