- REVIEWS
Camera Reviews 
More Reviews Mobile Reviews Photography Reviews - GALLERIES
- VIDEOS
- BUYER'S GUIDES
The Best Way to Convert Color Photos to B&W with 2 Other Methods to Try (VIDEO)

Most photographers routinely shoot in color without considering the fact that some images will appear far more dramatic and impactful in monochrome–especially those captured in dull light. This tutorial provides three ways to make the conversion in Lightroom and Photoshop, and it's super easy to do.
Today's video comes from Hamed Photography, a great source of quick lessons for editing images on any device, streamlining the gear you carry in the field, and in-camera techniques for capturing stunning photos with the equipment you already own. Hamed promises that "this video will help you create stunning monochrome images with ease—whether you're new to photography or looking to improve your skills."
Hamed walks you through three easy and powerful techniques for getting the job done to perfection. He also reveals the method he prefers when your goal is to create professional quality b&w photos. The technique that works best for you depends up the specific image at hand and the image-editing workflow you use.
There are several situations in which a conversion is called for: Maybe the colors look dull, contrast is lacking, or there's no real depth and texture. As you'll see, it' not difficult to make these images "really shine" by converting them to monochrome with far more impact and drama.
Hamed also notes that some color photographs fail to convey emotion—an important goal for visual story telling. Be sure to watch until the end when he reveals why the third approach that you'll learn is "my favorite and the most effective."
The first method is as simple as lowering the Saturation level all the way down in Lightroom's Basic panel. Once you've done that you can make further adjustments by experimenting with familiar sliders on the right side of your workspace. As Hamed explains, "The drawback of this approach is that you lose access to the Color Mixer panel." And this means you can't adjust tones using the powerful color sliders.
The second method is just as straightforward. Here all you have to do is click on the B&W button at the top of the Basic panel. "This technique allows you to use both of the basic adjusters, and in addition you do have access to the Color Mixer for more tonal control."
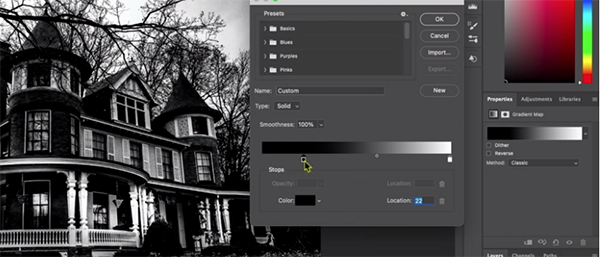
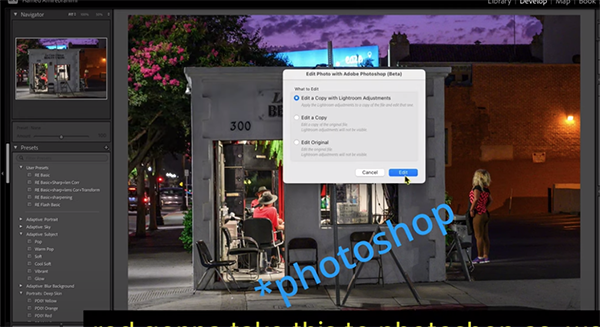
The third technique is Hamed's favorite and involves exporting your image to Photoshop, adding a b&w layer in combination with a Gradient Map and working from there. We'll let Hamed explain why this approach delivers optimum results, before walking you through the straightforward transformation process.
There's much more to learn on Hamed's instructional YouTube channel, especially for inexperienced users, so be sure to check it out.
We also urge you to watch the earlier tutorial we featured with another post-processing expert who demonstrates how he creates vibrant autumn photographs by using a powerful custom Lightroom Profile that's difficult to find because it doesn't live where you would expect it to be.


![]()
Get the Latest Photo Tips, News & Reviews from Shutterbug!
| Camera Reviews Other Reviews | Mobile Reviews Photography Reviews Columns | News | Features | How-To | Resources |
 © 2025 Shutterbug
AVTech Media Americas Inc., USA
All rights reserved