Shooting Crystals: All The Colors Of The Rainbow
The Chemicals
The first step is obtaining the crystals. Common birefringent substances that will crystallize are Epsom salts and photographic fix (the type used to fix black and white prints in the darkroom). In the past, I also used mothballs, but when I tried to photograph them for this article, they crystallized but I couldn’t get the colors that are typical of a birefringent chemical. It’s possible the formula was changed in the past few years. If you want to try them, put a few of the balls into an old pan on the stove and heat it. In a minute or two, they melt and then you can pour the liquid onto a sheet of glass, 8x10” is a good size to use. Any glass shop will cut glass to your specifications, and make sure you put duct tape along the edges of the glass to protect yourself from getting cut. When the hot liquid hits the glass, it crystallizes in a few seconds. There is no need to bring the mothball liquid to a boil. It melts long before it gets that hot.
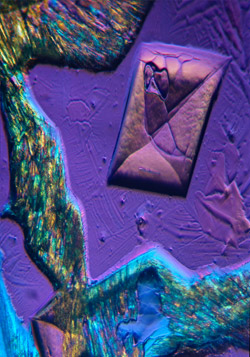
If you choose to use Epsom salts or photographic fixer, you have to dissolve the solid white chemical in water and then pour the liquid on the sheet of glass. Over several hours, the water evaporates forming crystals on the glass, (#1). You won’t see any colors at all at this point.

All Photos © Jim Zuckerman
Polarizers
To get the rainbow colors, you have to use two polarizing filters. A circular polarizing filter screws onto the front of the camera lens, and a second (in the form of a sheet of polarizing plastic) is placed between the sheet of glass on which the crystals have formed and the light source. You can purchase polarizing material in many scientific supply companies like Edmund Optics (www.edmundoptics.com) or even on eBay (www.ebay.com).
It is inexpensive and can be handled without fear of damaging it. Imperfections in the polarizing sheet won’t affect the results, although you will want to keep the glass polarizer that screws onto the front of the lens clean and scratch free.
For this article, I purchased a 52mm circular polarizer on eBay for a surprisingly small sum—$2.24! As you can see, the investment in materials to photograph crystals is quite minimal.
The Technique
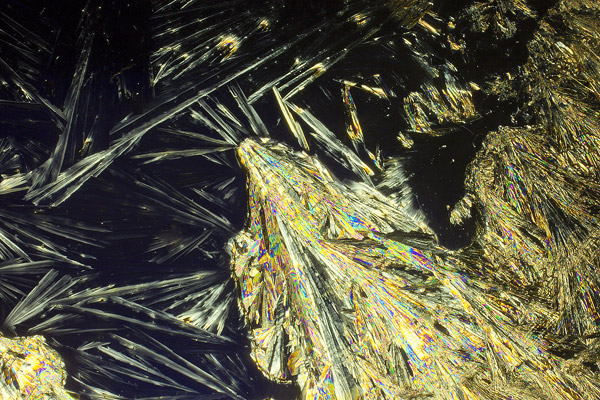
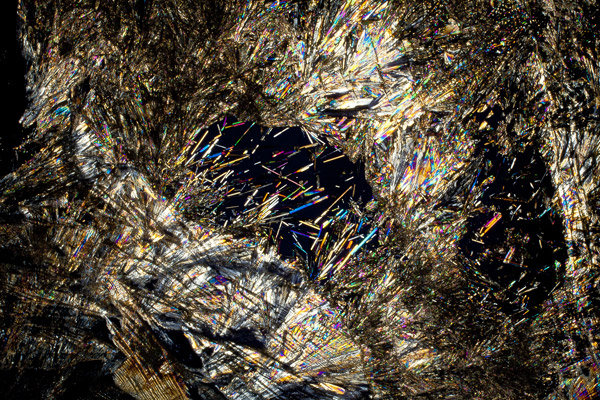
When a light source passes through the sheet of glass from behind, and one of the polarizers (it doesn’t matter which one) is rotated, the brilliant colors of the crystals are revealed. It’s a beautiful sight (#2 through #6). I like to position the polarizers such that there is maximum contrast and maximum color. This is obvious when you look through the viewfinder because you will see exactly what you’ll be able to capture.


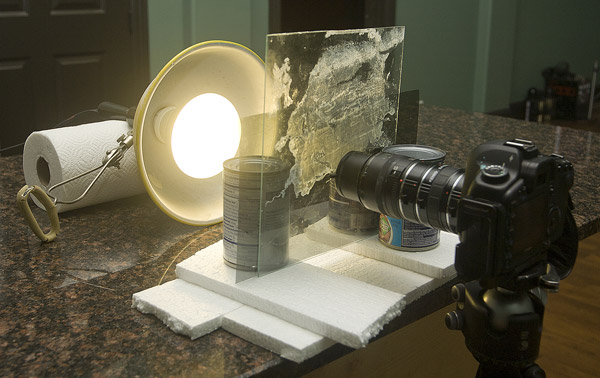
You will want to photograph the abstract designs with tack sharp clarity. I recommend using a tungsten light source placed about a foot behind the glass and the crystals. You can see the arrangement of elements in figure A. I used three cans of soup to support the glass (this isn’t exactly a professional looking setup, but it works and it shows you that you don’t need anything expensive or exotic to make this work), and the light source is simply lying on the counter top behind the glass. You can see the sheet of polarizing material behind the glass, and the working distance between the lens and the crystals is only about an inch. With a longer focal length lens, like a 100mm macro, that distance will be a few inches more. If you use a bellows setup with a microscope lens for extreme close-ups of the crystals, the working distance will be measured in millimeters.
Make sure that the camera’s white balance is set correctly. I recommend using the Tungsten White Balance setting assuming you are using a tungsten light source, and you should use Daylight White Balance if using window light (you can use window light but the exposures will be long). Don’t use AWB (Auto White Balance) because the colors won’t be correct.
The crystals that have formed on the glass are quite small, and to reveal the wonderful detail and color you will need a macro lens or a set of extension tubes, or both. A bellows would also work well. To take the pictures in this article, I used a 50mm macro with all three extension tubes that came in the Kenko tube set (www.thkphoto.com) as well as a Canon bellows with a 35mm microscope lens.
Macro photography requires technical discipline. This means a tripod is a must, and at the same time it’s critically important to make sure that the plane of the glass is parallel with the back of the camera (i.e. the plane of the digital sensor). Look at the set up from the side to make sure these two planes are as parallel as possible. When taking the picture, use the mirror lock-up feature to minimize vibration, and I recommend triggering the camera with a wireless trigger, a cable release or the self-timer set to 10 seconds. In addition, make sure no one is walking around in the room in which you are shooting. When a tiny subject is magnified with macro equipment, even a subtle vibration will cause the tripod to vibrate, thus making the picture disappointingly unsharp.
Focusing
With significant magnification, focus is unbelievably critical. If the sheet of glass isn’t exactly parallel with the plane of the digital sensor, even f/32 won’t give you enough depth of field. Therefore, I looked through the viewfinder and tweaked the angle of the glass in tiny increments until the crystals looked sharp to me from edge to edge. I turned the autofocus mechanism off so I could add tiny adjustments manually. In this situation, autofocus doesn’t work.
This technique, and all macro photography, works best when your tripod head can lock the position of the camera firmly. If there is a tiny amount of slippage typical of inexpensive heads, you’ll be very frustrated. It is almost impossible to be precise in your work when this happens. The tripod head I use is the BH 40 LR ball head from Really Right Stuff (www.reallyrightstuff.com).


