Capturing these animals really is making me wish that I could also be one of the best photographers of my generation. I think it's never too late to be one. - Wesley Upchurch
Stormy Weather: Photo Tips For When It Turns Nasty
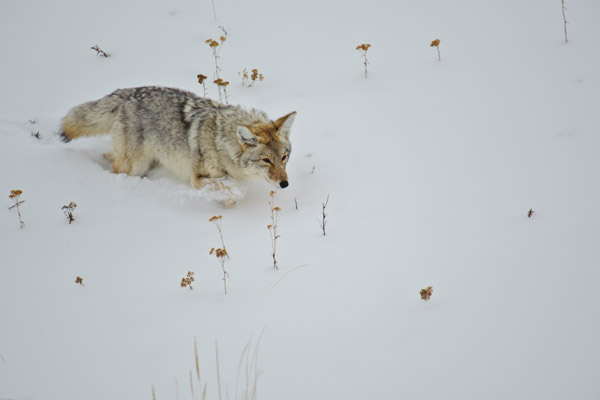
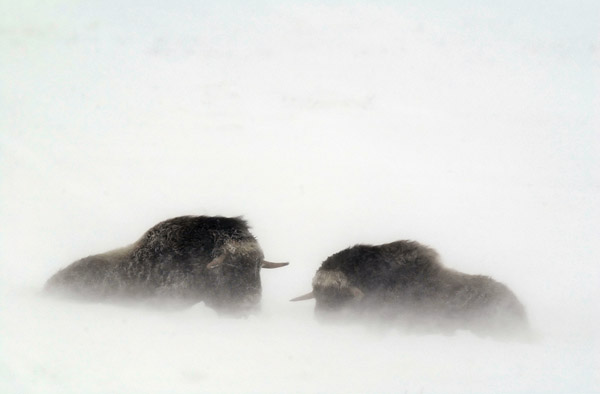
Some of the best photography is in the worst weather!” I’ve been saying that for decades and it comes from coming in from the cold, soaking wet and thrilled to death with the images I captured. The drama in the light, clouds and the response to it by nature is a once-in-a-lifetime spectacle you just can’t duplicate. In order to see it and photograph it, you have to get out in it and be able to work. And that’s where the challenge lies.

All Photos © Moose Peterson
Of course, there is the obvious, “take care of the photographer” in these conditions, which is very important. But that’s not what we’re going to talk about in this piece. (You can find out about gloves, jackets and boots on my website, www.moosepeterson.com.) We’re going to look at getting the most out of our gear and conditions, so we get those memorable and quite often once-in-a-lifetime images when everyone else is inside staying out of the weather.
It Starts With Gear
Many camera bodies today are produced with seals to keep moisture out and to prevent cold from affecting the internal parts. Knock on wood; I’ve never had any of my gear go down from weather (only from my being a klutz). You can enjoy the same record just by doing basically one thing, with one tool—it’s real simple!

What I highly recommend you add to your camera bag is a clean, white hand towel. Clean and white serves many functions, from a light reflector to heat deflector and, in this case, a moisture absorber. When shooting in rain or snow do not wipe your gear dry, you must blot it dry. This prevents you from forcing moisture into crevices where the moisture should not go.
You might have seen some of those incredibly fancy raincoats that are on the market. I tried them once, but never cared for them. You might have read about using your basic plastic trashcan liner as a cover, but I don’t care for those either, and here’s why. You have to take them off to shoot, and once you do you get moisture on your gear, which is then transferred to the inside of these covers. Put those covers back on your gear and the moisture is then being forced into crevices where it shouldn’t go, and then you have problems. I have seen this cause more problems than you can imagine. My own measure is—if I can personally tolerate the rain, so can my gear. I just keep that clean, dry, white hand towel inside my jacket and blot my gear dry and keep on shooting.
A word of caution about lenses that have part of their barrels extend and contract. If you have a zoom, for example, and you zoom out and get moisture on that part of the lens and then zoom back, you are forcing moisture into the lens barrel. This could possibly lead to electronic failure due to condensation in the elements when the lens warms up. Just grab that towel, dry it before contracting the lens barrel, and no problems!

Condensation Considerations
At some point, you will call it a day and head back into the warmth. I highly recommend that your camera bag stay cool while you’re out during the day and that, prior to getting back inside, you pack all your gear into it. Take out your CF cards and put them in your pocket so you don’t have to mess with getting them out of the camera once you’re inside.
Once you do get inside, open up your camera bag and get out all the gear you used that day. Lay it out and cover it with a clean, dry bath towel. Leave your bag unzipped, but the flaps closed, and place a towel over it and leave everything alone for at least an hour. Let the towels suck up any moisture that might form from condensation, rather than your gear. I’ve been doing this for decades and have never had a single condensation problem. Once your gear has come to room temperature, you can clean it for the next day. Once you’ve uploaded your cards and your gear is cleaned, pack it back in your bags and put it in the coldest part of the interior. If you never start the condensation cycle, you’ll have no problems with it the whole trip.
The one piece of camera gear photographers tend to always ignore, but that is the most prone of any piece to be affected by the cold, is the tripod. It just takes one itty bitty drop of snow shoved into the leg joint that melts, then freezes the next day, for that leg and tripod to be toast. I’ve seen it time and again, despite warnings.
Here’s what you need to do. First, always extend the last tripod leg to minimize snow getting into the leg joint. Next, have a second towel with you to dry off the legs as you collapse them. Lastly, don’t leave your tripod in a vehicle at night—bring it in, extend all the legs, and let it get warm and dry each and every night.
In The Great Outdoors
First, and while this is obvious, I see it all the time—photographers open their bag so rain or snow falls inside! That starts a condensation cycle you can’t break until you’re back inside. Set up your gear, which includes attaching lenses to the body, where it’s dry. I’ve had snow hit my sensor in a freak accident, leaving me with dust spots from hell. You don’t want to go there!
Carry your gear so moisture doesn’t fall into or blow onto your front element. Since I do head out in inclement weather all the time, all the lenses have Nikon NC filters attached to them (www.nikonusa.com), then I use that clean white towel to wipe any moisture that does land on the front elements.
If you’re in the snow and it does accumulate in your lens shade on your front element or eyepiece, it’s not an issue. Remember, this is frozen water, so the last thing you want to do is breathe or blow on it. Instead, use that white towel to whip/beat the snow off surfaces. (I keep telling you that the towel is your key to survival!) This action will cause enough of a breeze to send it flying while not creating any moisture.

Wet ground from rain or frozen ground from snow is not the best platform for your tripod. You don’t want to just set your tripod down in these conditions. First, extend the last leg sections to keep the first knuckle out of the wet and cold, if possible. Then once on the ground, push the forward leg down, forcing it past the surface of the mud or snow. This breaks the surface tension, giving the tripod a stable platform from which to work.
When you go to put your eye to the eyepiece, don’t breathe! This just fogs it up and makes shooting a real drag! I’m pretty obsessive about this; thinking about not breathing the entire time my face is up to the camera. When I know the conditions could cause this problem, the cameras are fitted with the Nikon anti-fog eyepiece DK-17a, which does a really good job (but I take it off when it’s not that cold, as it scratches easily).
One last use for that white towel is for getting in and out of a vehicle. When it’s cold out, we tend to make it warm inside and this can start the condensation cycle. That white towel can come out of the inside of your jacket and cover your gear while in the vehicle. I always have extras for this, but it serves the same purpose as when you head into your room at the end of the day. It’s a very simple thing that works really well.
Finally, Get Out There!
While you might be miserable shooting in less than sunny conditions, you can take comfort in knowing your gear can handle it. The overcast of rainy days, the white of snow and everything in between can offer great light that you simply don’t want to miss. And lastly, I’m here to tell you, get that clean, white towel! Use a little common sense and you’ll be addicted to shooting when the weather turns nasty!

- Log in or register to post comments


