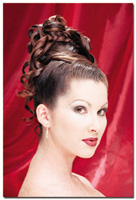
Photo Retouching Techniques
A Step By Step Guide For Big Prints From 35mm Film

Photo Retouching Techniques

Initial Scan

The art of photography and digital imaging has always been the kind of experience where the learning process never ends. There are always new techniques, pieces of equipment, or goals for the photographer to conquer. While the current state of digital photography allows studios to offer a variety of output options to customers, anything that can help set you apart from the competition is always an advantage. One of the more popular techniques I have been using lately involves the digital manipulation of images in Adobe Photoshop, Corel Painter, and Genuine Fractals.

There are a few reasons that I use this technique in particular. First, 35mm film scans generally don't hold up well under more extreme enlargements such as 20x30". Using this technique, I have the ability to finesse these images so that they print very well at larger sizes. Secondly, the technique also applies sort of a painterly look to the images; the very smooth nature of the images makes them very appealing, and is also the reason they scale up so well. The steps outlined in this tutorial can be used with any image, digital or scanned film.

Image After Step 1

Step 1:
The first step is performed entirely within Photoshop, and that step is to evaluate the image that you intend to work on. The end result of this process will only be as good as the original file, and we want to make sure that the image has both adequate highlight and shadow detail if possible. In the case of our current file, I scanned the image from 35mm negative film leaving the contrast a little flat. Once I opened the image in Photoshop, I ran two plug-ins (Quantam Mechanic Pro and iCorrect EditLab 2.0) that I commonly use to automate image correction tasks.

Next I performed any large spotting and retouching procedures on the image file. In this sample image we cloned the portion of the backdrop in the upper left-hand corner of the image, and repaired any large dust spots in the image. This is also the time where any straightening or cropping should be performed. Part of this technique involves compositing two images at a later stage, so if the pixel dimensions are kept the same throughout the process, the compositing remains very simple as you will see in later steps. Lastly, we save the image as a TIFF file. We also save the original file and archive the whole session to CD once we are finished.

Painter Settings

Step 2:
Open the TIFF image file in Corel Painter; in this case it is Version 7, although the interface is virtually identical on Version 6. Although Painter is a very powerful program, I am only using it to perform some simple tasks for this particular application. Painter has a variety of different brushes available, but for our purpose we want to choose the "Just Add Water" liquid brush. Using this brush will allow us to smooth the image while retaining color detail. Selecting the brush size and type is the other important setting. Areas of fine detail are better handled with the smaller brushes while painting in larger areas of solid color is easier with the large brushes. The simple slider controls are all we need to alter to adjust our brush size.

Example 1 (correct)

Using a Wacom Intuos graphics tablet, I simply paint the image to our liking. It is important to remember that losing some detail in our case is fine. In the next step I am going to bring this soft image back into Photoshop, and will be able to precisely control how much of this softness we want to keep when compositing this with the original.

It takes a little practice in Painter to acclimate to the brushes, and following the contours of the subject will prevent you from dragging colors as seen here. Because the colors tend to drag as if they were wet paint while using this brush, it is important that you paint carefully as the final product will reflect any sloppy work in this step. Once we have finished smoothing the image in Painter, we save the image as a new (separate) RGB TIFF file.

Example 2 (incorrect)

Step 3:
It is now time to composite the original Photoshop TIFF along with the version that we have altered with Painter. Based on the fact that each image has the same pixel dimensions (and they are both 24-bit RGB files), compositing these two files very precisely is simple. Open both files into Photoshop, select the move tool ("v" is the keyboard shortcut) and while holding the shift key, simply drag the Painter Enhanced image over the original file. This sequence perfectly registers the files with each other, and you can toggle the Painter altered layer on or off with the eyeball icon in the layers palette. In reality it does not matter which order the layers are stacked, however I typically find it easier to have the Painter layer on the top as the majority of the final result will be from that layer.

Step 4:
Photoshop's powerful masking capabilities are the basis for this next step. Using a layer mask (create one by clicking on the "Add Layer Mask" icon at the bottom of the layer palette) I can either paint away the existing layer, or paint it back if a mistake was made. This is a much safer method of retouching than using the eraser tool on the Painter layer, as the mask can be refined and saved with the image file whereas the eraser is more of a permanent edit.

In the example here (which still needs cleanup work in the eyes), we are painting on the layer mask with the paintbrush tool. Painting with black will reveal the layer beneath our Painter enhanced layer. This is exactly how we bring back any essential detail lost in softening the image with Painter. In this example we can bring back the detail in eyelashes, eyebrows, and other parts of the image that need to have adequate detail. Remember that varying the opacity of the brushes will give them a feathering effect that will prevent harsh edges. Generally, if key elements in this type of image are kept sharp, the softness of the image is completely acceptable in the final print. In this example, the red background would typically have more of a "grainy" look as the image was enlarged, however the softness introduced in Painter allows the background to remain extremely smooth when enlarged.

Step 5:
Once we have created and edited the layer mask in the previous step, there are a few more tweaks we can make in Photoshop. By varying the opacity of the Painter layer (you can also experiment with blending modes as well) the user can essentially "fade out" the top layer if you feel that the overall effect is too strong. The other operation I typically perform is to make a new layer, setting the blending mode to overlay and fill the layer with 50 percent gray.

When you create this new layer, nothing on the screen will change. However, this new layer becomes our way to dodge and burn on the image on a completely independent layer. When we paint with black on this layer, it will act as the burn tool and allow us to recreate some of the facial contours. Painting with white will act as the dodge tool, but using these on a separate layer also allows us to vary the opacity as well as save the layer for later editing.

I find it most helpful to toggle the Painter altered layer on and off to see where I need to add highlights or shadows, based on the original image, which becomes my reference layer. I often use the Painter layer at around 90-92 percent opacity. Generally the cheekbone area, nose, and under the lips need some dodging and burning to give the face more depth that was lost with the smoothing.

Lastly I spent a little time retouching the eyes with the rubber stamp tool, and fixed a few other small details.

Step 6:
Finally I save all of the documents in layered copies during the entire process. If the client wants the same image further altered in the future, I can access the layered file which facilitates editing much better than the flattened final image file. When I finished this image, I knew that my final print size was going to be 20x30". Using Genuine Fractals, I saved the file in their proprietary format. I then opened the file and proceeded to scale it from the original file size of 58MB, to 222MB for my final 20x30" print at 360ppi. The results are difficult to show in a printed magazine, but the large prints are significantly nicer than a straight film scan printed at a large size.

Closing Comments
From my experience, clients have been very receptive to this type of image. Everyone wants to look good in a picture, and this technique is not about altering body parts or physiques which clients may find objectionable. I think it accomplishes some of what a soft-focus filter does, but the image tends to look a bit more painterly and handcrafted. This technique can be a bit labor intensive, and I usually spend about three hours or so crafting a single image. Watching the final print come out of the printer has been very rewarding, and the quality of prints from 35mm film using this technique are astonishing.

COMMENTS
ELontina's picture

This would really help me practice my skills in photo editing, these are the typical steps that I wanna learn firsthand. - Michael Courouleau

X