Noise Reduction Comes Of Age; Plug-Ins For Getting The Noise Out
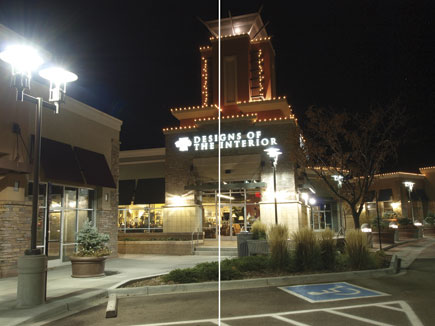
Noise in digital photographs is the visual equivalent of the static you hear in AM radio signals and the unvarnished truth is that most digital cameras add some level of noise to image files. The nearest equivalent in traditional photography is grain and, as in film, noise is more noticeable at high ISO settings and more visible in areas of uniform color, such as skies and shadows. Noise increases during long exposures made under low-light conditions, such as night photography, and is always more obvious in underexposed areas.
 |
|
|
Digital noise has many types and causes: dark noise is created by the heat produced in the camera’s sensor during capture when the dark current is collected along with image data from light passing through the lens. Random noise is created by fluctuations within the camera’s circuitry and even electromagnetic waves outside the camera. Signal noise is caused by fluctuations in the distribution of how light strikes an image sensor. Sometimes you hear the term “signal-to-noise ratio,” which is a measure of signal strength relative to background noise. Amplified noise is caused by using high ISO speeds and is the digital equivalent of chemically “pushing” film to achieve greater light sensitivity. Then there’s accumulative noise that is caused by slower shutter speeds.
Fortunately there are noise reduction solutions that can be applied to an image file either in camera or during postproduction using any of the noise reduction Photoshop-compatible plug-ins. (See “Plug-Ins.”)
 |
|
|
In Camera Noise Suppression
The way most manufacturers accomplish in camera noise reduction is a mash-up of marketing buzzwords and high technology and how it’s handled varies, and is highly proprietary. Here’s a brief overview for readers interested in how on-chip noise reduction is typically done:
A camera’s noise reduction is based, in part, on the type of noise that’s being processed. Noise comes in two basic flavors: fixed pattern noise is produced by uneven signal boost among different pixel amplifiers on the sensor; random noise occurs when shooting at different times of the day. Random noise is typically suppressed when the sensor resets the photodiodes that store electrical charges. Canon’s method for suppressing random noise is called complete electronic charge transfer (or complete charge transfer technology, depending on who you talk to about it) and ensures that the sensor resets the photodiodes storing electrical charges.
 |
|
|
Some D-SLRs offer a user-selectable noise reduction function that attempts to eliminate this noise after the file has been captured but before it’s written on the memory card. Fixed pattern noise can be suppressed by on-chip noise reduction technology using CDS (Correlated Double Sampling) that lets one light signal be read by two circuits. Initially only the noise is read and then it’s read along with the light signal. When the noise component is subtracted from the combined signal a lot of noise can be eliminated.
 |
|
|
More power creates more heat and noise. At long shutter speeds CCD sensors increase power consumption and more electricity flowing means heat and noise problems. The literally millions of photodiodes and amplifiers that are found in a CMOS sensor can also produce noise in the output image. To overcome this, Canon developed on-chip technology that records each pixel’s noise before exposure and then automatically subtracts such noise from the image when it is written, resulting in a relatively noise-free signal. To further counteract noise, Canon added a fourth transistor that acts as a transfer gate. Because of differences in the way CCD and CMOS sensors are manufactured, this kind of on-chip circuitry can only be added to CMOS sensors.
 |
|
|
Kodak designed four-transistor CMOS pixels that use their own proprietary configuration, while Nikon’s LBCAST (Lateral Buried Charge Accumulator and Sensing Transistor) is a completely new type of image sensor, different from CCD and CMOS, that saves power and produces less dark noise while increasing image-processing speed and improving sensitivity, contrast, and color reproduction.
Tip: One of the best ways to minimize noise is to use raw capture because, try as manufacturers may, all of the fancy in camera image-processing technology that’s used to eliminate noise during JPEG capture can also eliminate detail. Any noise that remains on your processed raw file can then be eliminated or at least minimized using any of the following plug-ins.
 |
|
|
Plug-Ins
Postproduction application of noise reduction offers some advantages. It can be used with your older image files that were perhaps made with a digicam that didn’t have built-in noise reduction. Applying noise reduction after capture also offers more control over how and where it’s applied. Noise reduction can be applied to a duplicate layer and changing the new layer’s opacity can moderate the effect. Noise reduction can also be applied to part of an image via the use of selection tools or applied to a duplicate layer and selectively erased, allowing the original image to show through and preserving sharpness in critical parts of the photograph. Both Adobe’s Photoshop and Lightroom programs have built-in noise reduction functions and, for some shooters, that may be all they need. But if you need something stronger or more flexible, it’s time to bring out the power tools.
 |
|
|


