Nailed Down Lighting
A Simple Setup For Volume Work
Many years ago when I opened my first studio, I visited another photographer who had been in business for many years. When I saw his camera room, I noticed he had a big "X" on the floor in a few places. I asked him what that was all about and he told me, "That's where the lights go." Then I looked at the samples he had on the wall, and sure enough, every one was lit exactly the same! I can remember leaving and thinking, "It's a good thing he doesn't name his studio The Creativity Place!" I kind of chuckled to myself how this "old-timer" had gotten by all these years. Now that I was in town, I was sure going to shake things up! I would never dream of "nailing" my lights down--I lit every individual in the way that was most flattering for them. Fast forward to 2002 and the world of digital capture. Things have probably changed more in the last three years than in the 20 or so previous ones, at least for the portrait and wedding photographer. When I first started, I was the only one doing outdoor portraits in my town! Enough of the history lesson, let's get back to the business at hand--nailed down lights. First, let's discuss the reasoning. Like most of my fellow portrait photographers, a good percentage of my work is now digital. In fact, all of the 200 or so high school seniors I photographed last year were done on a Fuji S1 camera. When I'm photographing high school seniors all day, I have about an hour and 15 minutes to do both studio and outdoor poses in four different outfits. We're talking about 80-100 shots of each student, so I'm moving in a hurry! Outside, I use many areas of the town I'm in, shooting 90 percent of the exposures by natural light. In the studio, I shoot head and shoulder poses, standing poses, and poses where they are seated on the floor. I don't have time to be tinkering with the lights on every shot. |
|||
My Lighting
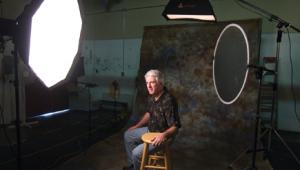
Solution So here's what I did. I figured I needed a "lighting solution." Here's the objective: Devise a lighting system that would give me a good, repeatable lighting pattern that would be flattering for most people. This lighting system must also be able to give very consistent exposure, whether the subject was standing or seated on the floor. I also wanted to be sure to use a small enough f/stop so that focusing errors would be minimized. That's the problem--read below for the solution. It's not that difficult a problem. A point light source, like a parabolic light, was immediately ruled out, since the light is very focused and drops off rapidly toward the edges. I considered a softbox, but it would have to be at least 4x8 ft and I was still concerned that the light would be much stronger on the side of my studio closest to the light since the box would be softer (because of its size) but still directional, and subject to the inverse square law. That law states that light drops off geometrically, not in a linear manner. For example, the light at 4 ft from the source would be twice as strong as the light at 5.6 ft from the source. The light at 8 ft would be half again what the light was at 5.6 ft. Sound familiar? If it doesn't, you've had the camera set on auto for way too long now. I figured umbrellas would be susceptible to the same predicament. What's a fast-shooting photographer supposed to do? |
|||
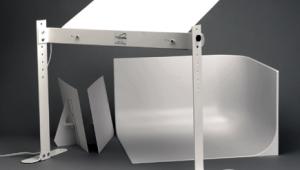
Super Light All I did was take a big piece of white fabric I had laying around that I occasionally used as a background and tacked it up. I made a little "L" shape with part on the wall and the rest just stuck out into my camera room. The part that sticks out I tacked to the ceiling. Then I aimed my Photogenic flash unit into it. Voila! Done. Now for the testing. Using a flash meter, I sat
on a stool where my subject usually sits and fired the light until I got
f/11. Great! Then I moved the meter to the floor. Pow! f/11. Standing
up. Pow! f/11. On the floor. Pow! f/11. To the right, to the left--you
guessed it, f/11. I had my light! With my lights all set in place, I metered the fill and main light together. I got f/13. I set f/13 on my digital camera (Fuji S1) and fired away. Perfect! I took test shots at f/11, f/13, and f/16 and determined that f/13 was the optimum exposure. Finished. Now I know I can walk in my studio, flick on the lights, and shoot at f/13 and every shot will be perfectly exposed! (Please note that shooting digitally is like shooting with transparency film--the exposure is critical and it is based on the highlights, not the shadows. As in any instance, conduct your own tests.) Now that I've been shooting this way for some time, how do I feel about it? Great! I shoot with an autofocus camera with a zoom lens. I have a radio control so I have no cords to trip over and none in my way in the studio. Exposure is a non-issue. Compared to shooting with a big camera on a tripod and manual everything, it's total freedom! I am able to relate with my subject better because I am paying attention solely to the pose and expression. They like it because it's so fast and I can take so many shots so quickly--it's just like a fashion shoot! Anyway, I know the question that is lurking in everyone's mind: Do you shoot every session with this lighting? The answer is no. I still like being able to have precise control of the direction and quality of light in some instances. But when I'm shooting all day and really have to fly, this is the only way to go! Don't forget to sign up for my biweekly e-mail newsletter and get great shooting tips twice a month! E-mail me at ephoto@stevebedell.com. |


