Getting The Right Light
Affordable Solutions To Expensive Problems
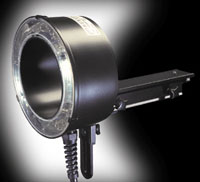
If I've said it once I've said it a thousand times, photography is all about light: where the light is coming from, how it hits your subject, how you expose your film to capture it, etc. Since my profession involves getting the right kind of light every single time, I've had to bulk up on expensive lighting devices. While I've always stressed affordable solutions to expensive problems, for this one time I'd like to encourage you to spend some money and do it right. While it's possible to get great images with little or no lighting equipment, it's pretty tough to get repeatable results when you're always relying on Mother Nature to provide great light. An even more difficult situation is to produce beautiful portrait lighting with only an open window, or smooth and seamless product lighting with a work light. Let's face it, good lighting products are expensive for only one reason--they're worth it. Here's a brief rundown on the stuff you have to own to call yourself a "serious" photographer. Studio Flash. While powerful, versatile bulletproof pro flash units like those from Speedotron, Norman, Profoto, Balcar, Broncolor, and others will set you back thousands of dollars, we now live in the age of the affordable monolight, so even those on a strict budget can get into the studio flash game. Pro-level monolights like those from Hensel, Broncolor, and Paul Buff pack lots of power, continuously variable output levels, modeling lights that accurately track the high output halogen lamps, and rugged metal outer casings. If your job is to travel around the world capturing brilliant images for high-flying clients, then you need this level of durability and quality. If your goal is to snap some gorgeous portraits of friends and family, light a few tabletop product shots for a handful of clients, or just do general interior photography, there is a staggering array of really inexpensive and perfectly serviceable flash units. |
|||
I've had experience with monolights from Paul Buff, Calumet, Balcar, Bowens, Hensel, and Profoto, and they all have their own advantages. I've even used those very inexpensive plastic encased units from JTL, Britek, and SP Studio Systems and produced exceptional results. The bottom line: if you consider yourself an "advanced amateur," "semiprofessional," or "professional" photographer, you must own some decent flash units with modeling lamps and at least 200 ws of power each. Thousands of photographers have started off with the rugged White Lightning WL 5000 from Paul Buff, or one of Novatron's excellent starter flash setups. I know a few photo assistants who produce remarkable work with a pair of Adorama Flash-point monolights, and a pro friend of mine uses Calumet's reasonably priced Travelite monolights as his primary location lighting source. Used Speedo and Norman packs and heads are available from any number of Shutterbug advertisers, and they're hard to kill. While not the cutting edge anymore, a used Speedotron 2401 pack and a couple of 102 heads will make you a pro in a heartbeat. |
|||
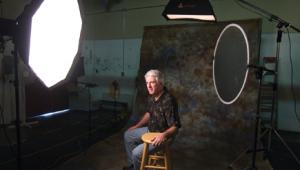
A Softbox. Once you have some lighting equipment, you'll need to modify that light to make it really "pretty." While umbrellas, reflectors, and other light modifiers are all useful accessories, to get nice lighting, retain reasonable flash efficiency, and set up and breakdown with little effort, you need a softbox. Today's commercially available softboxes all share a similar design. A series of rods--aluminum, fiberglass, or carbon fiber--slide into pockets in the shell of the softbox fabric, then snap into a central ring, causing the softbox material to form a nice smooth tent of light. Most softboxes feature a white front panel and black sides. The side panels have white or silver material affixed to the inside. While the silver panels produce more light, the white ones do produce a little bit softer and smoother light quality. |
|||
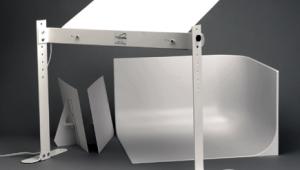
I have a couple of light boxes from every manufacturer, and they all have their respective pros and cons. For example, Chimera light banks have long been the favorite of pro still photographers as well as video and movie guys. While you pay a premium for their exceptional quality and remarkably varied product line, they last for a long time and are really well made. As for Photoflex, I use about a dozen of their banks for all of my location lighting and have been really pleased with the quality of their light output and construction. I prefer the slightly more expensive Silverdome banks, which are designed for hot lights. I like the extra light output, and the heavy-duty silver lined panel construction holds up well to the rigors of the road. In the studio I really like the hard-to-find Larson Soffbox. Larson was one of the early softbox manufacturers, and the newer Soffboxes offer a really smooth, clean light quality. I've also bought a few of those Westcott light banks, and you really can't beat them for the price. If you've got a really small studio space at home, look into the very shallow Wafer light banks from Plume. They offer traditional light bank front panels with very shallow depths. A Flash Meter. Okay, now you've purchased some slick flash units, a couple of pro-looking softboxes, but you've got to figure out how much light you've got. Once you start introducing softboxes, umbrellas, and the like, you're going to have a devil of a time figuring out your f/stop using guide numbers. A really good flash meter is a tremendous luxury, but even an inexpensive one-trick-pony meter is a bare necessity. |
|||
While you're shopping you might want to look for a meter that doubles as an ambient light meter, since a decent light meter is also one of my "basic" necessity items. Build A Kit. A common tale of a photographer trying to get into the semi-pro lighting game goes something like this: you do your homework, search the Internet, call pro camera stores, and study the pages of Shutterbug like it was a final exam. You pick your flash units, a couple of umbrellas, maybe even a synch cord. When it all arrives you realize that you left out a bunch of stuff. Obviously you'll need light stands, and try not to skimp. Those inexpensive stands that many vendors offer are lightweight and wobbly. A decent 7' Bogen light stand is only a few bucks more, so splurge. Once your flash unit is mounted to a decent light stand, you'll realize that you need more ways to control your lighting than just "soft" or " hard." Reflectors of different depth, diameter, and focus can really liven things up. Light constrictors like stovepipe attachments, snoots, and honeycomb grids can narrow your light all the way down to a relatively narrow pinpoint of light without resorting to expensive optical spotlight attachments. Barn doors, scrims, and moveable gobos allow you to selectively remove light from the scene, something that any good photographer should figure out how to do. Once you've got your kit together you'll need a way to store and transport it. I like really heavy-duty cases for air travel, and have routinely packed my lights in rock-star quality Anvil flight cases. Now that I'm a few years older and the airports are a little bit longer, I've gone to lightweight Lightware cases with wheels and handles. While I'm sure that they can't offer the same level of protection as a real flight case, nothing has broken yet. If you're creative like me, you can retrofit hard-sided suitcases into pretty nice flash kit flight cases. If you have a wholesale club near you that sells one of those tall hard-sided "Pullman" suitcases, you can build a flight case for your whole system for well under $100. Test Yourself Silly. One of the most important things that any photographer needs is experience. Experience with different lighting sources is really important, especially with instantaneous light sources like studio flash. While a Polaroid back or digital camera can help you see exactly what the flash is doing, there's nothing like color slide film to really see where the rubber meets the road. I always test a new flash unit, light head, or tungsten-based light source. A roll of Velvia will go a long way to figuring out where your color temperature is, as well as the accuracy of your flash meter. If you don't have a flash meter, you can use the old tape measure trick. Measure off 10' from your flash unit with the reflector or diffuser of choice, then shoot a roll of film at apertures between f/5.6 and f/22. When the film comes back, find the correct exposure and calculate your guide number. If you've got 100 speed film at 10' and you have an f/16 exposure, that's a guide number of 160. The formula is simple: film speed divided by distance times f/stop is your guide number. Now you can just measure off your flash to subject distance and do the math backward; simply divide your guide number by the feet between your flash and subject and you're all set. (Since the film speed remains constant you don't need to include it in the equation.) Look And Learn. The only way to create great lighting is to know what it looks like in the first place. It is incredibly important to look at a lot of photography and try and figure out what kind of lighting the photographer was using. Telltale reflections in the eyes are one way to reverse engineer a great portrait, but sometimes it's just a matter of trying to get a feeling for the quality of light. Is it highly directional or omnidirectional? Soft or hard? Does the light have a warm or cool color to it? Is there a mixture of soft and hard lighting? Perhaps there is some diffusion on the lens. It's important to learn what others are doing, because there's no point in reinventing the wheel. Stealing another photographer's style isn't terribly rewarding if you pride yourself as a creative person, but sometimes trying to purposely copy a particular look can be a great teaching tool. When I started out I tried to copy the gorgeous product photography I saw in magazines, with mixed results. It took years of shooting to get comfortable with my lighting style. Now I'm pretty good at creating almost any style of lighting. Mix It Up. Now that I've told you what to buy do me a favor--disregard everything I've said and do it your own way! In fact, don't get any flashes, pick up a couple of old movie lights with big 8" Fresnel lenses. Don't get a softbox, instead get a big "Silk" diffusion panel and beam your Mole Richardson lights through those. Need more light? Find a big Kliegl 2K cine light and a Matthews studio stand to hold it up. Even better, mix in the hot lights with the flash lights, letting the continuous tungsten balance of the hot lights warm and soften your scene, while the flash units nail the crisp, hard detail. It really doesn't matter what your style is, you'll probably do better quality work if you have the right tools in your toolbox. The Bottom Line. You're going to need some lighting gear to get serious about creating great lighting. If your thing is to capture the light as it occurs, pack a Leica M6 and good luck. But if you want to have the ability to make light that satisfies you whenever and wherever you need it, you'll need more than a Domke bag, Nikon F2, and a few rolls of Tri-X. Trust me, I've tried it on a shoestring and it's too tough to be consistent. Now that I have the correct tools I'm a lot happier. |


