- REVIEWS
Camera Reviews 
More Reviews Mobile Reviews Photography Reviews - GALLERIES
- VIDEOS
- BUYER'S GUIDES
First Look
Photoshop 7.0, Is It Worth The Upgrade
When I read the general description of what was new in Photoshop 7.0, my expectations were high that what I would experience would justify a full upgrade number from 6.0 to 7.0. After whining to the Photoshop team about poor retouching tools for the last couple of years, I was anxious to see if they had listened. There are four features in this upgrade that are new and which relate to the digital darkroom and photography. As usual, most of what is new is for illustrators and web page building. This always puzzles me since 85 percent of the illustrations that are published are photographs, compared to relatively few that are created from scratch by an illustrator. Usually what is new for photographers are tools that are needed to help work with digital photographs. But I was very disappointed once I tried using the four new features that are photographically useful, or rather should be. New Browser |
|||
Auto Color To back-up this opinion I made some simple tests. In the past, doing tests of new and different films I always made some bracketed exposures of the ubiquitous MacBeth Color Checker, so I dug out a few of these made on different films and made raw scans of them just adjusting the gamut in the pre-scan. I made two copies of each Color Checker image, and then proceeded to manually adjust the colors using the Levels dialog's eyedropper tool to set the highlight and shadow as well as the mid-tone grays to remove any color cast. Then, on the second copy, I used Auto Color to do the same thing. Well, the Color Checker has a pretty typical, even distribution of colors, and it did a good job adjusting the colors by removing any color cast in highlights or shadows. But it must assume all images scanned have parallel density curves for each of the RGB channels, because it did not remove color casts caused by the RGB curves not remaining parallel in the mid tones. |
|||
I then selected some scans of portraits made in the studio against different colored backgrounds. When I manually adjust color in a raw scan of a portrait, I ignore the background color as well as the color of clothing and adjust the color values to obtain the best rendition of skin tones, letting all other parts of the image colors fall where they may. Of course, Auto Color does not know the image is a portrait, so it assumes it should have a typical distribution of color and reads a whole bunch of color from clothing, and or background, and adjusts the image according to the overall color content. This resulted in skin tones that are way off from what they should be. In other words, don't expect Auto Color to work unless you make stereotypical images of trite, ordinary subjects. If you make images which vary from the usual, Auto Color will not recognize the uniqueness of the subject (like a high key wedding portrait) and will make adjustments assuming it is a stereotypical snapshot subject. Adobe needs to understand that no amount of programming can substitute for the skill that comes from knowledge and experience and a critically trained eye. That is the only way you obtain image excellence. Programming just reduces everything to the lowest common denominator of mediocrity. Retouching Tools |
|||
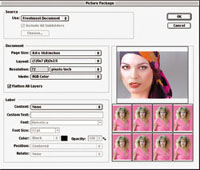
For instance, in shadows under the eyes, a frequent area that requires retouching, most of the time the skin is discolored with a bluish or greenish tinge of color and the light reflects oddly from that abnormal skin. So, I would want to pick up color from a normal area of complexion tone and clone it into the shadows under the eyes rather than have the color and lighting appear the same as before. In another instance I want to clone in normal, peaches and cream skin tones to a dark, brownish mole I want to remove, so I don't want that dark, brownish color to be retained. If the Adobe Photoshop programmers had consulted someone like myself, who has retouched thousands of photographs on both analog film and paper as well as digitally, and watched how I work and asked what kind of tools are needed, they might have provided some that are useful and increase efficiency. So really no improvement has been provided, just a modification of the old Clone Stamp that slows the process down so much that it would take all day to accomplish what I can do in less than an hour. In under an hour I will make from 1000 to 2000 clicks with my Wacom mouse-if I used the Healing Brush it would fall way behind and never catch up. I feel that what is offered is unrealistic and is not what is needed. Years ago, Zsoft PhotoPaint had almost a dozen different brushes ideally configured for retouching. Unfortunately, when Corel bought the program they did not understand retouching either and did not keep most of them, and my opinion is that neither Zsoft nor Corel has the excellent color handling and superb engine under their applications that makes Photoshop number one. But maybe because they are number one, and have little if any competition, they think they know better than the user what the user needs and wants. But from the perspective of an old-time master retoucher, the Healing Brush and related Patch Tool miss the mark by a mile, and tools we could use and have suggested are ignored because apparently Adobe thinks they know better what we should want or need. Picture Package Why The Upgrade? For more information, contact Adobe Systems Inc. at (800) 833-6687 or visit their web site, www.adobe.com. |


![]()
Get the Latest Photo Tips, News & Reviews from Shutterbug!
| Camera Reviews Other Reviews | Mobile Reviews Photography Reviews Columns | News | Features | How-To | Resources |
 © 2025 Shutterbug
AVTech Media Americas Inc., USA
All rights reserved