The Darkroom
Portrait Backgrounds; Giving "Snaps" A Studio Touch
All of us take snapshots. Sometimes those snapshots can be turned into very nice portraits. Take a look at one of my snapshots (#1). Actually, this snapshot was taken of my wife Faye and I, one night when we were out celebrating our son's wedding. The picture was taken on my old-fashioned Nikon 990 digital camera. I call it old-fashioned because it is only 3.2 megapixels and is now out of production. After looking at the snapshot, I thought the image of me was truly beautiful (grin), but the image of Faye was a tad better. Her head had a nice tilt and angle to it that looked something like a studio photographer might have posed. Obviously, the background had to go. |
|||
I started by selecting the Cropping tool. Then, in #2 I set the tool to width, 8"; height, 10"; and resolution, 300 ppi. |
|||
With those settings, the Cropping tool will give me a perfect 8x10 selection (#3). |
|||
Selecting The Subject |
|||
It wasn't necessary to be real accurate with this. I only wanted to make a rough selection. Next, I clicked on the Quick Mask mode tool (#5). This caused a red transparent layer to appear over the picture except for the area that I had selected with the Lasso tool. Now, the real selection process began. I like to use the Erasure tool and the Paintbrush tool to fine-tune the rough selection that I made with the Lasso tool. The Erasure tool will erase unwanted parts of the red mask and the Paintbrush tool will paint back in the red mask where you might need it. |
|||
In order to perform this fine-tuning of the red mask, you need to first magnify the image up to just below where you would begin to see little square pixels. Then select a soft-edged brush and adjust its size. In my case, I set the Brush size to 50 pixels and the Opacity to 100 percent (#6). Then, in #7 you can see the round brush as I am erasing the red mask from around the eyeglasses just to the left of Faye's nose. |
|||
Image #7 will also give you
some idea of how much magnification I use, and the brush size at that
magnification. |
|||
In order to mask around the hair, I first went around the edge--the best I could--with the 50 pixel-size brush. Then, I selected a very tiny brush and set the Opacity to about 10 percent. I then went back and nibbled here and there at the outline edge of the hair to make the edge more irregular. This business of masking hair is very tricky and will take a bit of practice. You need to change brush sizes and opacity frequently in order to get the jagged, irregular, effect of the hair outline. Yes, there are several other methods of making such selections. However, the method that I am describing here is easy for beginners to learn and it serves well for a wide range to things that you might want to select. By changing brush sizes and opacity levels you can create a Quick Mask very easily for all kinds of different subjects. |
|||
Once the Quick Mask is completed, you can turn off the red mask by clicking on the Off button (#8). Once the Quick Mask is turned off, the image will look something like #9 with the famous "dancing ants" around the edge of the selection. But, remember, you used a soft-edged brush, so the real edge around the subject will be greatly diffused. The dancing ants don't show the state of the diffusion. |
|||
And Now The Background |
|||
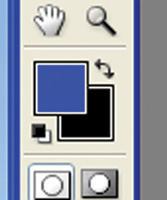
Now it's time to create a nice, professional-looking background. I wanted a dark blue background with the corners of the portrait graduating out to black. That is done with the Gradient tool. First, select the colors that you want for the gradation. I wanted blue and black. So, I set the background color to black, and in order to select a nice shade of blue, I went to the Swatches Palette and clicked on the primary blue square. See the red arrow in #11. |
|||
Immediately the foreground color becomes blue (#12). |
|||
In a moment I will lay in the blue gradient background, but I don't want the dancing ants to distract me from making a visual judgment as to how the background looks. To do that, go to View to Show to Selection Edges and click to remove the check mark that is there when the ants are visible (#13). |
|||
Next, I went to the toolbar and selected the Gradient tool and then selected the circular version of it. I placed the cursor in the middle of the subject's face and dragged the cursor to the upper right-hand corner of the picture (#14). When I released the mouse button, the gradient was laid in everywhere that had not been selected--the background. If you have things set up correctly the place behind the subject's head will be blue fading to black at the corners. If you have things reversed, with the color black behind the subject's head and blue in the corners, go back to #12 and click on the little curved arrow heads to swap the colors blue and black. Then, place the cursor back on the subject's face and drag to the corner again. |
|||
De-Band That Background |
|||
Finished portrait is (#16).
Compare to #1 isn't (#16) better? |


