Color Calibration; Using Black And White To Correct Color; A Simple But Effective Tool
Consistently achieving accurate color may be digital photography's most
difficult skill to master. Shooting the same subject under different lighting
conditions can cause unacceptable color variations which can be difficult and
time consuming to correct later. Digital cameras have many more color balance
options than film ever did, but when the ambient lighting changes from shot
to shot, as it can at a wedding or stage performance, getting perfect color
in camera can be impossible.
Automated solutions promise much but are often inconsistent. Without a known
neutral in the image their color balancing act is mostly guesswork. Including
a true point of reference, such as Ed Pierce's Digital Calibration Target,
simplifies everything. The following workflow will give photographers a fast,
easy way to ensure clean accurate color.
Color Correction Tutorial |
|
 |
|
|
You will need a digital camera that allows you to select the white balance and adjust exposure manually, a full version of Photoshop, a Digital Calibration Target (#1) from www.PhotoVisionVideo.com, or true white, black, and 18 percent gray reference cards to shoot.
 |
|
|
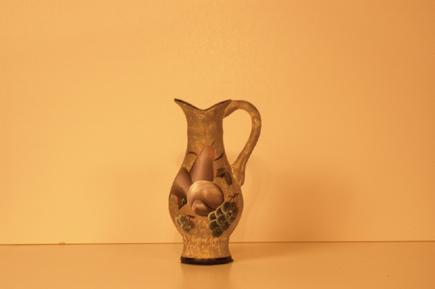
Step 1--Set the camera's white balance. You can use anything but Auto. Try and match the light source as closely as possible and do not change your selection for the duration of the shooting session. To create an extreme example, I set the camera to a cloudy day white balance and used only modeling lights mixed with incandescent ceiling lights (#2) for illumination.
 |
|
|
Step 2--Photograph the Digital Calibration Target to create a reference image. Be sure to fill the frame with the Digital Calibration Target (#3).
 |
|
|
Step 3--Now photograph your subject under the same lighting conditions (#4).
 |
|
|
Step 4--Next, transfer your images to your computer and open the reference image in Photoshop. Select Image>Adjust>Curves to open the Curves dialog (#5).
 |
|
|
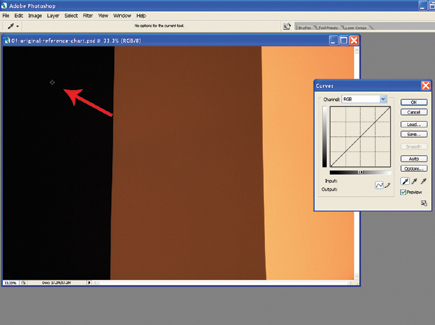
Step 5--Set the black, white, and gray points using the eyedroppers. First, select the black point eyedropper and click it on a black area of the target (#6). Then use the white point eyedropper to click on a white area of the target (#7). Lastly, use the gray eyedropper and click on a gray area of the target (#8).
 |
|
|
 |
|
|


