- REVIEWS
Camera Reviews 
More Reviews Mobile Reviews Photography Reviews - GALLERIES
- VIDEOS
- BUYER'S GUIDES
Crash Course
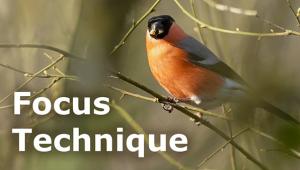
A Short Lesson In Wildlife Photography
Imagine this: You show up for a wildlife photography shoot in Africa. An expert guide with a Land Rover outfitted especially for photography meets you. Camera mounts are set securely in place on the doors of the vehicle. Several padded, easy-open cases for long lenses are mounted inside the vehicle. Beanbags are handy for supporting cameras and lenses in a hurry. You have plenty of film. Perhaps best of all, you have three months to shoot! A dream come true? It sure did, for National Geographic photographer Chris Johns, one of the world's premier wildlife photographers. That's how he traveled while shooting his cheetah story for National Geographic (I know because I saw a television program on his adventures). Well, I don't know about you, but I don't have all the aforementioned luxuries. However, I still get good wildlife pictures. And you can, too, by following a few basic wildlife photo tips. Pack the right gear. The Boy Scouts of America follow the motto, "Be Pre-pared." That's good advice for wildlife photographers--who must be prepared for a wide variety of photo ops. |
|||
Choose your lenses carefully. For my animal portraits, my basic lenses are my 70-200mm zoom and 100-400mm zoom. When an animal is far away, I use a 1.4x tele-converter on my 100-400mm zoom, which when set at 400mm gives me an effective focal length of 560mm. For pictures of animals in their habitats, I use my 17-35mm zoom--when I can get fairly close. If not, I use my 70-200mm zoom. Don't forget filters. I use a polarizing filter to darken the sky and to reduce reflections on water. I use a warming filter to give my pictures deeper shades of red, orange, and yellow, a skylight filter to protect the front element of my lens, and a graduated filter to darken the sky when it's much brighter than the land in my pictures. Film. Pack way more than you think you'll need. I use fast film for low light and fast action shooting. Lately, I've been using ISO 200 film pushed one and two stops. For bright-light shooting, I use ISO 100 film, which produces nice enlargements with no noticeable grain. Batteries. Here, too, bring more than you think you'll need. Autofocus lenses and motor drives, essential for wildlife photography, use up battery power fast. Don't be caught without power. I pack a lot of batteries, and I'm glad my wife is sometimes along to carry them (as well as all my back-up gear: extra lenses, camera bodies, etc.). |
|||
Pack a flash. I never go out to photograph animals without my flash and a flash extender, which, you guessed it, extends the range of the flash. Flash extenders attach to flash heads with touch fasteners, so you can attach them and remove them quickly. You'll find them invaluable when an animal is in the shade and when you want to add some sparkle to an animal's eyes. Tote a tripod. Sure it's no fun to lug around a tripod. But you'll be so happy you did when you need it in a low-light situation, when conditions dictate using a slow shutter speed. A monopod is a good second choice for a camera support. And if you will be shooting from a car, pack some socks before you leave home and fill 'em up with beans on site for custom-made beanbag supports. Me? I tote a tripod and a monopod, as well as a pair of socks! Pack it in. The bag you pack your gear in is important, too. You want your gear protected, and you want quick access to it. I usually use a camera backpack, with a built-in rain hood. But that's just what I like. Before you choose a camera pack or packs, envision your shooting situations--from a vehicle, on foot, over rough or smoother terrain, etc.--and choose one that meets your needs and budget. Work with a guide. If you want to maximize your time in the field, that is, find animals fast, then you must work with someone who knows the territory. Go it alone and you could spend many hours or days looking for wildlife. Sure, a guide will cost extra money, but in my 20 years of shooting, I've come to realize that it's a very good investment in my pictures. |
|||
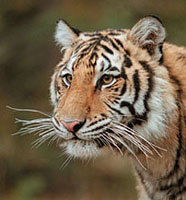
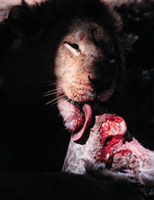
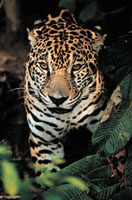
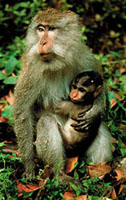
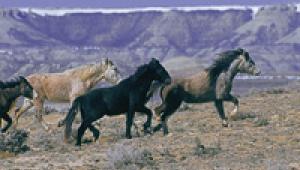
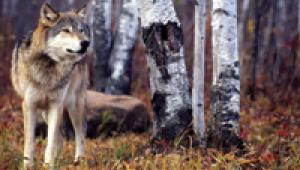
Study your subject. Each species of animal has its own habits, and lives in a select habitat. If you know where to look and what to look for, you'll have a better chance of getting a behavioral photograph--a picture in which the animal is doing something that is part of its life. Find out as much as you can about the wildlife you'll be photographing. There is a lot of information on the web. Simply use a search engine like www.google.com and type in the animal you want to photograph. Hundreds of listings will appear on your monitor in a few minutes.
|
|||
Know The Basics Practice at home. Great
wildlife photo opportunities come and go in an instant. That's why
you must be ready to shoot on demand--in a few seconds. If you practice
all your photographic techniques at home, perhaps at the local zoo or
wildlife park, you'll get a much higher percentage of good pictures
in the field than if you had just relaxed at home and looked at great
wildlife pictures, which actually is a good idea, too. No, I don't
mean relax! I mean look at wildlife pictures and think about how you could
take those kinds of pictures, or perhaps even improve upon them. |
|||
And, this one is kind of simple, but all too true: you must go to someplace with great wildlife for great wildlife pictures. My favorite spots are Galapagos and Africa. Rick Sammon is the host of the Photography Workshop series on the Do It Yourself Network and guest host of the Canon Photo Safari on ESPN. |


![]()
Get the Latest Photo Tips, News & Reviews from Shutterbug!
| Camera Reviews Other Reviews | Mobile Reviews Photography Reviews Columns | News | Features | How-To | Resources |
 © 2026 Shutterbug
AVTech Media Americas Inc., USA
All rights reserved