- REVIEWS
Camera Reviews 
More Reviews Mobile Reviews Photography Reviews - GALLERIES
- VIDEOS
- BUYER'S GUIDES
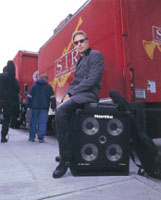
Studio Style
Using The Sun And Your Imagination
If you've been reading
any of my articles recently, you're no doubt aware that I like
lighting gear. I especially like studio flash generators, big pro flash
lamp heads, heavy-duty movie set style Matthews "C" stands,
giant softboxes, focusing Fresnel lights, Bogen "Super Boom"
arms, and lots more expensive gear. Right now I own well over 25,000
ws of power divided up over 11 power packs, firing through 16 heads,
diffused by close to 20 different softboxes and a dozen more umbrellas.
While I don't need all of this stuff everyday, I do need this
much stuff a couple of times a year. I'm really able to justify
keeping all of this gear only because I like lighting gear. A more prudent
photographer would own a good arsenal of stuff and rent the exotic pieces
as needed. Not me, I like using my own equipment that I'm familiar
with. |
|||
The first thing that every
photographer must be concerned with is light. Quality and quantity are
critically important. With a good studio flash system, neither are ever
in doubt, however out in the field you'll have to deal with the
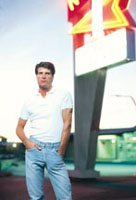
sun and whatever other ambient lighting is available. There are three
accessories that you must own to create good-looking light in the field--an
extension cord to get your flash off the camera, a small softbox or diffuser
for your flash, and a portable reflector card or folding reflector panel.
|
|||
The last accessory that you
must have is a good reflector card. Cheapskates like me fashion our own
out of white foamcore and some silver reflector material--a very wise
investment is a knock-down reflector system. Considering that a 42"
reflector system with a silver face on one side and a gold face on the
other is less than $75, it makes good sense to own one. If you're
hell-bent on frugality, then you can do what I do. I take a 30x40"
piece of foamcore and cut it in half, making two 30x20" pieces.
I rejoin the two pieces with a wide strip of sturdy Gaffer tape on one
side only, creating a hinge. Then I cover the taped side of both sheets
with a single sheet of a silver material like Cinemills excellent M-270
Scrim material. This woven silver material allows some light to be bounced
back by the foamcore, the rest by the silver surface of the scrim. The
result is a very nice folding reflector card for around $20. |


![]()
Get the Latest Photo Tips, News & Reviews from Shutterbug!
| Camera Reviews Other Reviews | Mobile Reviews Photography Reviews Columns | News | Features | How-To | Resources |
 © 2026 Shutterbug
AVTech Media Americas Inc., USA
All rights reserved