- REVIEWS
Camera Reviews 
More Reviews Mobile Reviews Photography Reviews - GALLERIES
- VIDEOS
- BUYER'S GUIDES
Controlling Background Brightness
In The Studio And Outdoors
People who have attended art classes have been taught that in order to produce depth in a painting there must be a foreground, middle ground, and background. Control over this dimension and depth usually is the result of planning and foresight. As photographers we tend to often overlook the foreground and generally allow the background to fall wherever it wants. Controlling the background is an area of photography that can be mastered as long as the photographer learns to think about what the scene will look like after appropriately using a light meter to establish the true exposure of the subject. Shifting The Key Of A Photograph |
|||
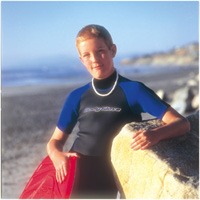
If you've ever seen a movie or video shoot, you've noticed the crew raising very large scrims of a translucent material. The purpose is to allow light to travel through the fabric in order to control the quality of light on the subject and at the same time elevate the brightness of the background. The loss of light caused by the fabric requires an adjustment of the exposure. Video crews also use large lights bouncing into silver panels designed to brighten the light on the subject in order to darken the brightness in the background. By lighting the primary subject, background control is easy to achieve. One of the easiest ways to understand the effectiveness of keyshifting is to place a subject in bright sunlight and make an exposure. The subject and the background will have an equal brightness level. If you place a translucent material between the subject and the sun, the subject will receive less light. By adjusting the exposure for the loss of light on the subject, the background will naturally get brighter. |
|||
In terms of what the film sees, taking light away from the subject effectively adds light to the background. The more light you take away, the brighter the background will appear. In this case, in addition to changing the background you are also changing the quality of light on the subject. Diffusing the direct sunlight softens the shadows and lowers the brightness of the highlights. Understanding how to best use this simple technique causes a photographer to look at backgrounds differently. I will often look at a particular area that will be my background and try to visualize what it will look like if it is overexposed by one or sometimes even two stops. This will help me if I know I am going to place a translucent disk or panel between my subject and the sun to change or possibly improve the light quality on a face. |
|||
Thinking Like Film A photographer who has full control over his or her environment will take advantage of this technique by previsualizing the scene and thinking about how it will appear on film, not simply to the naked eye. Always keep in mind that our eyes will fool us into seeing one thing while the film sees another. |
|||
Background Control In The
Studio The converse is also true. If you need the background to be darker it's a problem if your background light is on its lowest power setting. By thinking about shifting the key, you can easily increase the brightness of the lights on your subject. This will increase the subject brightness. When you close down your aperture for the increase of light, your background gets darker. |
|||
In applying this technique to your own photography, try to remember it is as an exercise in thinking more than anything else. It is all about thinking forward to the final result and taking charge of your picture. Tony L. Corbell is a long-time professional photographer, educator, consultant, and author in the photographic community. For more information, contact: www.corbellproductions.com. Technical Equipment |


![]()
Get the Latest Photo Tips, News & Reviews from Shutterbug!
| Camera Reviews Other Reviews | Mobile Reviews Photography Reviews Columns | News | Features | How-To | Resources |
 © 2026 Shutterbug
AVTech Media Americas Inc., USA
All rights reserved