- REVIEWS
Camera Reviews 
More Reviews Mobile Reviews Photography Reviews - GALLERIES
- VIDEOS
- BUYER'S GUIDES
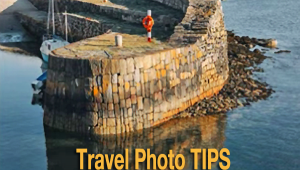
Shooting Snow & Ice
It's winter, and with the season come wonderful opportunities to produce some great snow and ice photos. On the following pages are a few tips to help you do just that.
The basic idea is to have the brightest areas of snow or ice appear white, but with a trace of detail. Very small areas can be blank white, but large areas should have some texture and detail. The keys to getting white snow with detail are in the exposure and the lighting, which will be discussed in tips 1 and 2. You can also improve your snow shots with filters (tip 3), and by adding a touch of color (tip 4).
Snow and ice photos generally look nice just because of the nature of the subject, but you should still use principles of good photography when making them. Don't forget to compose your photograph! Examine what is in your viewfinder. The time to critique your photo is before you press the shutter button, not after you get the finished print. If you see a flaw in the finder, fix it before you shoot. If you can't fix it, go ahead and shoot anyway, but at least think about what's in the finder and how you can improve it before each shot.
1. Lighting
 |
|
|
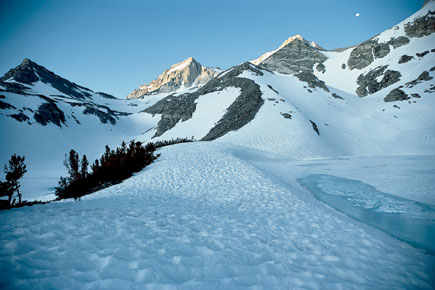
As with just about all photography, good lighting is the key to good snow photos. And as with most outdoor photography, the lighting is most attractive early or late in the day, when the low-angle sun casts long shadows, and the light is directional but not so harsh as midday sunlight. When possible, move around your subject and shoot with sidelighting, backlighting and front lighting.
 |
|
|
Snow scenes generally look best in sunlight, so it's best to shoot them after a storm clears rather than while it is snowing. Not only will the photos be prettier, you'll be a lot more comfortable, too. However, it is possible to get good shots when it's cloudy, and even while the snow is falling, so if you get the opportunity, go for it. Clearing storms present some of the best photo ops of all.
2. Exposure
 |
|
|
Reflected-light exposures meters (which include those built into cameras) measure the light reflected from the scene. The thing to remember is that these meters are calibrated to reproduce whatever you point them at as a middle tone. If you expose based on a reflected-light meter reading of white snow, you'll get gray snow in your photo. So the standard advice is to open up 1--2 stops from the meter reading when photographing snow. (Of course, this applies when you are taking the reading from the white snow--if you are taking a reading from a person wearing a dark ski suit while he or she is standing in snow, that's a different story.) In a pinch, take a reading of the clear blue north sky, and expose per that reading.
You can also get good exposures on snow by using an incident-light meter, which measures the light falling on the scene instead of the light reflected from it. The incident meter cannot be fooled by non-"average" subject matter because it doesn't "read" it. The caveat here is that the light falling on the incident meter's translucent dome must be the same as the light falling on the subject or scene: If you are in the shade, and the subject is in the sun, the incident reading will overexpose the subject. The best way to use an incident meter is to hold it right in front of the subject, and point the meter's hemisphere at the camera. This is simple when the subject is nearby, but not so simple when the subject is that mountain range in the distance.
 |
|
|
|
| |||||||||


![]()
Get the Latest Photo Tips, News & Reviews from Shutterbug!
| Camera Reviews Other Reviews | Mobile Reviews Photography Reviews Columns | News | Features | How-To | Resources |
 © 2026 Shutterbug
AVTech Media Americas Inc., USA
All rights reserved