- REVIEWS
Camera Reviews 
More Reviews Mobile Reviews Photography Reviews - GALLERIES
- VIDEOS
- BUYER'S GUIDES
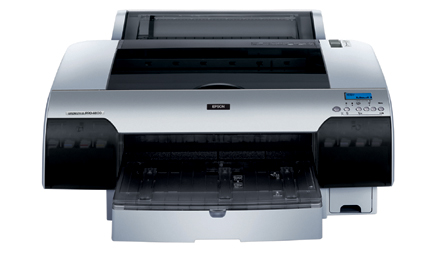
Epson’s Stylus Pro 4800; Monochrome Digital Printing Has Arrived
Here at Shutterbug we have followed the long and sometimes tortuous road toward getting quality black and white prints digital style. Readers, and we, have suffered through the rigors of metamerism, bronzing, and the associated color shifting and frustrated attempts to match what's on the screen with what comes out of the printer. We have tried duotones, third-party inks, and even black ink-only printing. While we await the testing of the new Epson Stylus R2400 (the 13x19" K3 printer) we have had the opportunity to work with the new Epson Stylus Pro 4800, a 17" wide printer that sports the new K3 inksets, the same setup as the R2400. The 4800 sells for $1995, with a "pro" edition, which includes a Pantone-licensed, SWOP-certified PostScript, Language Level 3 Compatible RIP by ColorBurst, and an Ethernet card (for shops and studios), that sells for $2495.
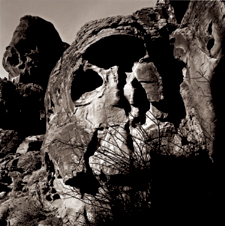
Does pigmented ink printing replace silver printing? No, but as a way of making
expressive prints, those who respond to tonal variations and discrete controls,
it will keep even the most demanding printer busy with, and excited about, their
work. Does the new generation of Epson printers cure the problems of the past,
those that seemed inherent to the medium? Yes, and it also responds to desires
for warm, neutral, or "cool" prints, even duotone printing, in a
way that many of us have been awaiting. Do the prints pass the longevity demands
as well? Yes, if 200 years plus black and white satisfies you, at least when
using recommended display and storage guidelines on certain papers, according
to Wilhelm Imaging Research (www.wilhelm-research.com).
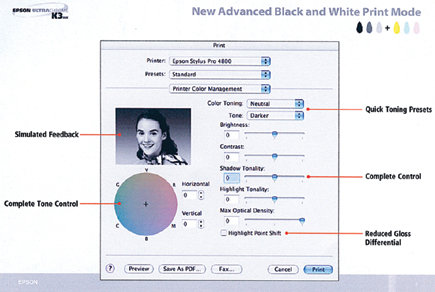
Much of this success can be attributed to the new generation of pigmented inks,
which Epson calls UltraChrome K3. According to Epson, UltraChrome K3 inks are
of higher density than those in the past. In addition to cyan, magenta, yellow,
light cyan, and light magenta, the inkset can include black, light black, and
"light, light" black inks. Of course, the drivers also play an important
role, but more on that later. There are two ink modes--Photo Black and
Matte Black--which are swapped out to maximize ink density on the two types
of media. The Matte Black is for use with Epson Fine Art, Enhanced Matte, and
UltraSmooth Fine Art papers, and those of their ilk.
 |
|
|
The print head in the 4800 features 180 nozzles per channel and can yield
2880x1400 resolution. Epson claims that a 16x20" print can be output in
a bit over six minutes, and our tests confirm this, given that you start the
clock after the information hits the printer. You can work with roll, with built-in
cutter, or cut sheet up to 17x22". If you use one of the four paper feed
options, being straight-through front manual feed, you can handle up to 1.5mm
thick poster board.
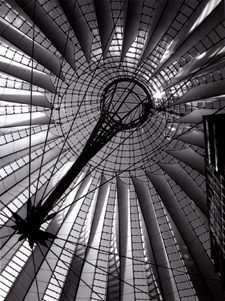
We printed both color and black and white images with the 4800, going for the
16x20" print size in each case. Images came from a variety of sources,
including converted 48MB raw files from a Canon EOS-1Ds Mark II and scans from
35mm and medium format slides and negatives that ranged from 48-72MB in size.
Initial tests were on Epson's Luster paper, a very fine surface that has
both the softer qualities of matte surface and the sharpness one associates
with glossy.
 |
|
|
This is hardly a desktop unit; lacking a stand, we worked with a thick plywood
board atop some sawhorses. It isn't lightweight by desktop standards,
coming in at over 85 lbs. But setup was relatively easy, after some hefting
and tape removal, as was loading the ink cartridges. We worked with FireWire
connections off a Mac iBook, which looked kind of funny sitting next to the
large printer. During driver installation we also installed the Epson LFP (Large
Format Printer) remote panel, which allowed for access to firmware updates on
the website, power cleaning, media counter settings, and media adjustment.
As mentioned, there are various media paths through this printer. You can use
the supplied paper tray and manual top feed for most--check the instruction
book for the differences and to match media with the loading procedure. You
will use the front manual feed slot for UltraSmooth Fine Art, Textured Fine
Art, Enhanced Posterboard, and Velvet Fine Art, for example. The paper tray
use is pretty standard, using sliders to adjust for paper size. Roll paper requires
the supplied roll adapter; note that while there is a built-in cutter, there
are some media types, such as Water-Resistant Canvas, Vinyl, Banner, etc., that
will not work with the cutter. It's a good idea to check the paper configuration
settings as well, especially when working with paper of various thicknesses.
All this might seem like lots of backroom homework to get set up, but once you
do the process all you need to do is save the settings and select the appropriate
one when you switch media.
Printing setups are fairly typical, and won't be foreign to anyone who
has printed before...to a point. Of course, this is where many printmakers
have disagreements about the best course to follow. In Color Management we chose
ColorSync for color prints, and given the proper paper profiling we got dead-on,
screen-matching color each and every time. You do have a number of options here
to tweak, including Mode (color space) and Gamma, with 1.8 being the default.
You can also mess with brightness, contrast, saturation, etc., but that's
where your testing will come to the fore, matched to your individual taste and
how you like to work. Once you do all this, and are confident with results,
just save the settings for future work on the same paper.
 |
|
|
|
| |||||||||


![]()
Get the Latest Photo Tips, News & Reviews from Shutterbug!
| Camera Reviews Other Reviews | Mobile Reviews Photography Reviews Columns | News | Features | How-To | Resources |
 © 2026 Shutterbug
AVTech Media Americas Inc., USA
All rights reserved