- REVIEWS
Camera Reviews 
More Reviews Mobile Reviews Photography Reviews - GALLERIES
- VIDEOS
- BUYER'S GUIDES
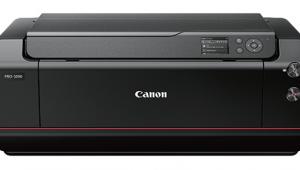
Epson’s Stylus Pro 3800; A New Look In 17” Wide Printers
Having worked with and tested the Epson Stylus Pro 4800 (Shutterbug, November 2005 issue, or type Epson 4800 in the Search box on our homepage at www.shutterbug.com) I can attest to the fidelity and quality of the Epson UltraChrome K3 inks and to the reliability of this wide format, 17" wide printer. But there were two complaints I had about the printer, which I believe were shared by others. One is its weight and size, typical for wide formats of the day, which required two reasonably in-shape people to manage its heft. The other was that you had to swap out inks when you went from photo to matte black sets. In other words, if you wanted to print on fine art rag paper then swap out to glossy paper you had to take some time and expend some ink to do the deed. Needless to say, competitors made much of this and cited it as one of the major reasons to avoid this otherwise excellent printing machine.
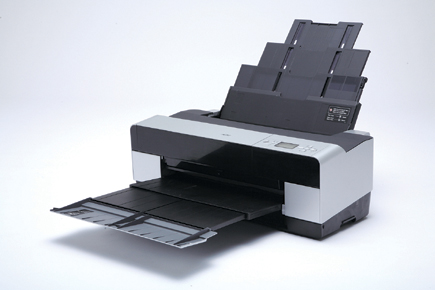 |
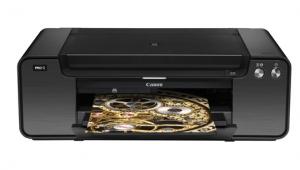
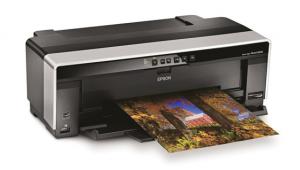
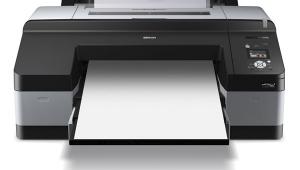
Well, it seems Epson heard this, and while the 4800 is still available (list: $1995) the new Epson Stylus Pro 3800 (list: $1295) should appeal to those who might not need the roll paper attachment or greater ink capacity cartridges of the 4800. The 3800, it strikes me, is intended for those who want a 17" wide printer that is more tabletop friendly both in terms of the space it takes up and its considerably lighter weight. It handles all manner of cut-sheet paper, however, in both a high-capacity feeder and, for thicker stock, in pass-through, single cut-sheet fashion. And while not lightweight, this 17" unit comes in at about 43 lbs, considerably better than the 83+ lbs of the 4800.
The nine inks come in 80ml carts (the 4800 featured 110ml carts) with the colors being cyan, light cyan, magenta, light magenta, yellow, light black, light-light black plus photo black and matte black. It being swappable in terms of the photo and matte black, the unit uses eight inks at a time. This saves on ink during the swap, although some is expended during the process, depending on which way you travel. According to Epson, you lose 4.5ml during the matte to photo black swap and a mere 1.5ml when you go from photo to matte black. The best way to avoid this type of ink loss is to simply set up your printer for matte or glossy print runs and not jump back and forth between the two. That's how I worked with the 4800 as well, which ate up a bit more ink on the swaps. The changeover is now a simple menu item on the LED, and not a pull cart in and out dance as it is on the 4800.
|
Warm Tone
|
|
 |
|
|
The Pro 3800 can handle prints as small as 4x6", though that size seems dwarfed by the printer and somewhat odd to run on this machine. It can also handle up to 1.5mm thick media. There is no bulk feed tray or roll paper accessory on this unit, or available. You feed through one of three portals--a top loader that Epson says can hold up to 20 sheets of standard photo media (more if you want to use it for text printing on bond paper, but why would you do that?), another single-sheet top loader for what they deem "thick" fine art paper, and a front loader for posterboard-type media up to 1.5mm thick. This printer might just open up printing on supports that you had not previously considered, which might make it interesting for all the art school multimedia types out there. It should be noted that when using the front manual feeder for thick media, size is limited to 16x20".
|
Page Setup
|
|
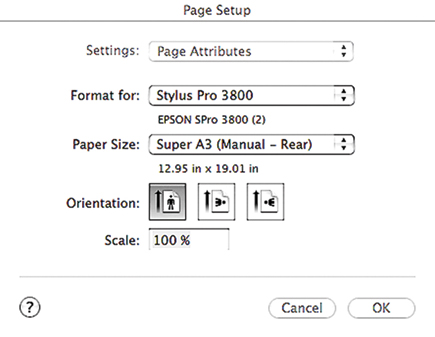 |
|
|
The UltraChrome K3 inks allow you to print with a good deal of confidence that whatever you print today will be viable quite far into the future. For the up-to-date ratings check out www.wilhelm-research.com. Predicted lifespan of inkjet prints is of course dependent on many factors aside from the media and ink itself and it's almost bizarre in how it can vary depending on the paper you use. For example, according to Epson, printing with color on their Enhanced Matte yields a predicted span of 110 years, yet in black and white on their UltraSmooth Fine Art you get over 300 years(!)
|
Print Setup
|
|
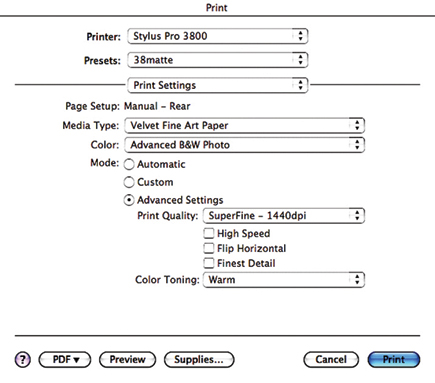 |
|
|
|
| |||||||||


![]()
Get the Latest Photo Tips, News & Reviews from Shutterbug!
| Camera Reviews Other Reviews | Mobile Reviews Photography Reviews Columns | News | Features | How-To | Resources |
 © 2026 Shutterbug
AVTech Media Americas Inc., USA
All rights reserved