- REVIEWS
Camera Reviews 
More Reviews Mobile Reviews Photography Reviews - GALLERIES
- VIDEOS
- BUYER'S GUIDES
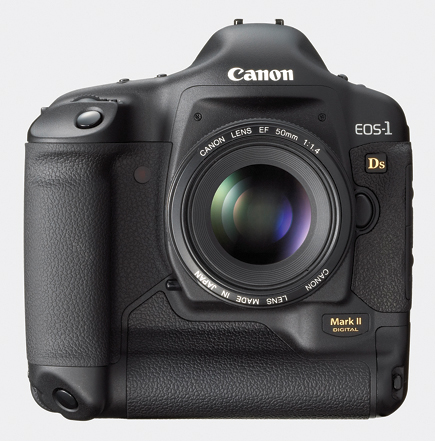
Canon’s EOS-1Ds Mark II
The Digital SLR Big Shot
Photos © 2004, George Schaub, All Rights Reserved
About a year ago I called up a stock agency to whom I'd been submitting
35mm and 6x7 slides for years and told them I was considering sending digital
files. "Oh, don't worry about that, we scan your slides for you,"
they kindly replied. No, I told them, I want to start submitting files made
directly in a digital camera. Just what size files would they need? "Well,"
they told me, "35MB, non-interpolated TIFFs would be fine." Oh, never
mind, I said, having my dreams of sending in files directly from my
8-megapixel digital camera dashed. I went right back to carrying a film camera
along with my digital SLR on my travels.
That was then and this is now, especially with the release of the new Canon
EOS-1Ds Mark II. This would be the ultimate stock/location camera for me, I
thought, one that had 16.7 effective megapixels and delivered 48MB+ files. In
addition, that full-frame sensor meant that my wide angle lenses would finally
behave like wide angle lenses. And, because the camera allowed me to shoot raw+JPEG
files I could simply shoot in raw+, and deliver the JPEGs as proofs before I
processed the full-resolution raw images on approval.
All seemed a dream come true, and for many the EOS-1Ds Mark II will be just
that, a camera that beats 35mm slides hands down and rivals medium format quality
and resolution. But for some, including myself, that dream hits up against a
hard reality--namely the asking price of body only, at $8000. While there
are those who might not flinch at the price tag, 8k is mucho dinero, making
the camera a commitment as much as it is a product. But before we get too steeped
in that discussion let's journey through the specs and follow up with
some field shooting experiences.
 |
||
 |
 |
|
|
||
Inside a magnesium-alloy body that we are assured is dust- and water-resistant,
the EOS-1Ds Mark II sports a 17.2-megapixel sensor with 16.7 effective megapixels,
the largest full-frame sensor in its class. The camera accepts Type I and Type
II CompactFlash cards as well as SD (Secure Digital) cards in a side by side
slot arrangement. Switching between the two card formats is easy using a button
on the back of the camera along with the Command dial.
For my tests I used a Lexar 40x 8GB card, knowing full well that I'd be
using all 8GB during shoots that when set at raw+JPEG took up about 20MB per
shot on the memory card. Of course, when opened, using the full res settings,
I'd get a 48MB+ file size. As I shot I used another good and useful feature,
also accessible from the camera back, that of making separate file folders for
each group of pictures. This allowed me to download distinct folders and to
keep shots in neat compartments, great for editing and further file renaming
later. You can't rename the folders in the camera itself, but that's
easy to do once you have them downloaded.
Choosing format and resolution is also made quick and easy with a simple push button dial selection on the camera body. It didn't make sense to me to shoot at anything but max resolution, but you can do so if you choose. For my work I chose raw+M2; as mentioned, the raw file takes up about 15MB of space while the M2 JPEG setting takes up about 3.2MB, with a resultant 3600x2400 pixel file. The largest JPEG file is 5.5MB, which means that at max resolution you are compressing about 1:8. This is fairly high compression in my book, but pictures do not seem to suffer as they might with other digicams I've used.
 |
|
|
Shooting with raw+ with this camera makes the most sense to me, as raw gets you into so many creative games, a topic we'll cover later. But you can also set what Canon calls "parameters" and "color matrix" processing in raw+ (or just with raw or just with JPEG). The raw file does take on the attributes you set and the variations you choose will show up when the raw image is opened. However, it's easy enough to change these, as they are instruction sets rather than embedded, as they are in the JPEG files. It's very easy to back out of decisions made in the field in raw, not always so easy in JPEG.
In any case, these parameters and color matrix settings allow you to play
with color saturation, with skin tone rendition (using the Portrait matrix),
and color space. You can also manipulate the tone curve, sharpness and contrast,
and bank the settings in the parameters, if you will. If you like you can bank
a high contrast rendition, high key or even low key/low sharpness, etc. The
sky's the limit, and you can match whatever image mood you want to every
subject and scene.
Of course, shooting raw you can do all this later with software, but if you
want it right out the box you can get it the way you like it without excessive
post-exposure processing. This might save time later, but keep in mind that
although these settings can be quite nuanced in camera you'll not have
the control you might want. It's almost like using an "auto"
setting--sometimes it's on the money and other times it's just
settling for a look because you don't have the time or disposition to
do it later. It's your call.
 |
|
|
I judge a camera--be it film, digital, or instant--on how flexible
it is in the field. In this regard my favorite aspects of the EOS-1Ds Mark II
are the ability to quickly and easily set white balance and especially ISO.
These factors are why digital SLRs often blow film SLRs out of the water for
convenience and flexibility. The new Canon lets you go quickly from ISO 100
to 1600 via a set of push buttons and rotation of the Command dial. You can
even go to ISO 50 or 3200 if desired, but you have to go into the menu to take
that step. But once you turn on the extended sensitivity it stays on.
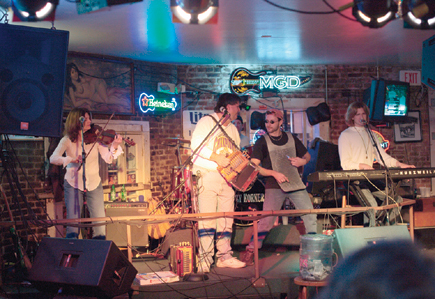
I shot in New Orleans for part of this test, and would keep the camera at its
"native" ISO 100 for the colorful walls and buildings in the French
Quarter using a Tamron SP AF17-35mm zoom, but quickly switched to ISO 800 or
1600 for crawls inside the music halls (kindly put) on Bourbon Street. And when
I shot without flash inside Kern's Mardi Gras World in Algiers, Louisiana,
(a must visit for New Orleans photos), I'd shoot with my Canon 50mm f/1.4
lens at 800 or 1600. By combining lenses, fast or moderately fast, with ISO,
I found I could shoot handheld without flash in just about every venue I encountered.
The camera offers more white balance options than you could possibly use, even allowing for white balance bracketing and white balance compensation in 100K increments. This, I'm sure, is ideal for commercial and studio portrait photographers, who will find this camera up to any lighting condition. Frankly, however, after going through various white balance sets, I found that shooting on auto in raw did the trick for me. True, I did not do spectral analysis of the color spectrum, etc., but I got just the flavor of the color sets I wanted without much fuss and bother.
 |
|
|
As to other features of note the EOS-1Ds Mark II has plenty; in fact, it's
what you'd expect--it's a state of the art digital SLR. In
brief:
· AF points: There are 45 AF points in the finder and
you can let the camera do its thing or set various groups yourself. You can
set any number of variations as required by the way you work and the subject
and scene before you. I'm a center-point, focus-lock kind of guy, being
somewhat of a dinosaur, but for general street shooting I just set it on auto
and was pleased 99 percent of the time.
· Drive modes: Drive mode can be set at single or continuous,
which gives you about four frames per second. I was unable to make the camera
lock up waiting for image processing in continuous, perhaps in part because
I used the Lexar WA (Write Accelerated) 40x card. My only problem was that continuous
is a thoroughbred that likes to run, and more than once I took more in a sequence
than I liked, due to my heavy trigger finger and flagging reflexes. At 20MB
of memory card space per shot that's no joke, but I found out later that
I could limit the number of shots in a continuous sequence using the "Personal
Functions" settings.
|
| |||||||||


![]()
Get the Latest Photo Tips, News & Reviews from Shutterbug!
| Camera Reviews Other Reviews | Mobile Reviews Photography Reviews Columns | News | Features | How-To | Resources |
 © 2026 Shutterbug
AVTech Media Americas Inc., USA
All rights reserved