- REVIEWS
Camera Reviews 
More Reviews Mobile Reviews Photography Reviews - GALLERIES
- VIDEOS
- BUYER'S GUIDES
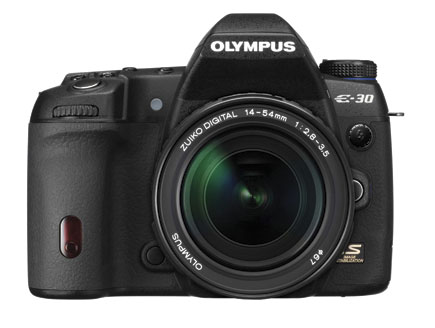
Olympus’ E-30; All The Filters Of The Rainbow
While some may consider the Four Thirds system (www.four-thirds.org) to be the Rodney Dangerfield of the D-SLR world, there is no doubt it has enabled Olympus to produce a series of cameras that represent one of, if not, the best pixel per dollar value today. All that is combined with a build quality that on a model-to-model basis is superior to its competition, especially at the entry-level end of the D-SLR spectrum. So instead of coming up with another me-too D-SLR, Olympus decided to build an impressive camera that goes where none has gone before, the Olympus E-30.
 |
What’s It Like
The Olympus E-30 fits into the E-System line-up above the E-520 and slightly below the flagship E-3, to which it bears some resemblance, and combines the performance and image quality of the pro-level E-3 with the E-520’s consumer-friendly features. As with all Olympus D-SLRs, the E-30 includes Dust Reduction and in-body mechanical Image Stabilization so every Four Thirds system lens you attach is stabilized so be sure to remember to turn it on. The new camera offers the upgraded TruePic III+ image processor that lowers image noise in images shot at higher ISO settings, producing better results in low-light situations, as we’ll see later. It processes images from a new 12.3-megapixel sensor that has a state-of-the-art amplifier circuit that minimizes noise and captures fine details in shadow and highlight areas, resulting in impressive-looking image files.
The biggest hype surrounding the E-30 focuses on its “Art Filters” and Multiple Exposure function and I’ll get to that later but there’s more to the E-30 than those two features, however spectacular you or I might think they may be. The E-30, for example, is equipped with an internal Digital Level Sensor that detects the camera’s pitch and roll and displays it in the optical viewfinder or during Live View operation. This Digital Leveler is a useful tool for architectural photographers (all we need is a Four Thirds system PC lens) as well as landscape photographers who want straight horizon lines.
 |
|
|
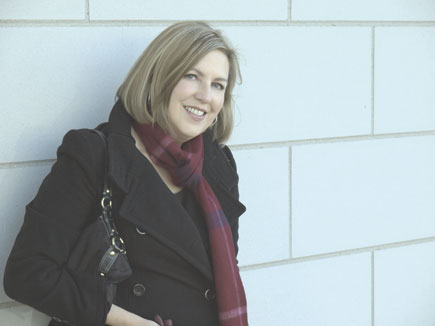
The E-30 offers two autofocus systems, including Fast Autofocus with AF Live View 11-point AF and Phase Detection AF using twin cross sensors. Both take advantage of Olympus’ SWD (Supersonic Wave Drive) technology and provide fast, quiet autofocus. (See “E-30 AF Tips.”) Like the E-3, the E-30 has a swiveling 2.7” LCD preview screen that can be freely rotated so you can shoot overhead or low to the ground without needing to visit your chiropractor afterward. Live View enables photographers to communicate face-to-face with subjects and my wife Mary often uses this with portrait subjects and looks over the camera and smiles. This melts even the most cold-hearted subject and produces pleasant portraits.
The E-30 lets you capture images in your choice of nine aspect ratios, including the Olympus standard 4:3, 16:9, 6:6, 3:2, 5:4, 7:6, 6:5, 7:5, and 3:4 for JPEG capture. All raw files are captured in the default 4:3 ratio and the aspect mask information is tagged onto the EXIF data and applied, should you so desire, during processing. Other features of the camera are common to all Olympus E-System D-SLRs, including Face Detection that recognizes up to eight faces; Shadow Adjustment to automatically control highlights and shadow exposure; and Dust Reduction with its SSWF
(Super-Sonic Wave Filter) system that works so well I didn’t have to dust spot a single file from the many thousands of images that Mary and I shot.
 |
|
|
Art Filters
Art Filters are six “creative” (you push the button, the E-30 does the rest) filters that Big Oly claims, “offer the photographer the ability to expand the narrative of a given subject.” What it really does is give you instant access to in camera special effects. All you have to do is select ART/SCN on the mode dial and the Art Filter menu options are displayed on the LCD. If you are concerned that you might change your mind and want to have the “original” images back, just choose the raw+JPEG option and you will capture two files, the untouched raw image and the enhanced JPEG file.
 |
 |
||
|
|
After choosing any of the filters some of your other creative options are minimized, but you can adjust some aspects of the image such as white balance, exposure compensation, ISO, flash intensity, and wireless flash control. For the Art Filters I found that exposure compensation was the most used control. Since Art Filters are applied along with the exposure, the camera calculates the effect’s parameters; this prevents distortions from occurring in individual color channels. The six filters, in order of appearance in the menu, are:
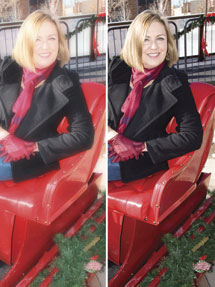
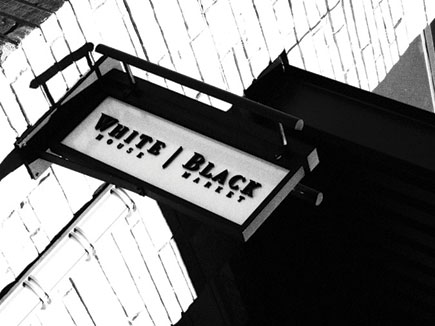
Pop Art: Enhances colors, making them more vivid and a bit contrastier. This was Mary’s favorite but given that we were shooting during the Christmas holidays it might have been affected by her choice of subject matter. It’s like having your very own built-in “Pete Turner” filter.
Soft Focus: Creates the familiar soft focus effect that works with still life or portrait subjects. Since there is no way to control the amount of soft focus, one of the best ways to use this filter may be to simultaneously capture raw and JPEG images and apply the soft focus file as an additional layer. You can then control the amount of soft focus by changing the opacity of the layer.
 |
|
|
Pale & Light Color: This uses muted color tonalities to apply a gentle-looking light on the image file. Photographers who are fans of on-camera filters, which I suspect will be big fans of all of the
Art Filters, might liken this to Cokin’s Pastel filter.
Light Tone: This choice subdues highlights and shadows to reflect the ambience of a “perfectly illuminated” scene. Both the shaded and highlighted areas are rendered softly while maintaining detail. Users of Tiffen’s Contrast filters will like the E-30’s Light Tone Art Filter’s ability to control contrast in a scene.
 |
|
|
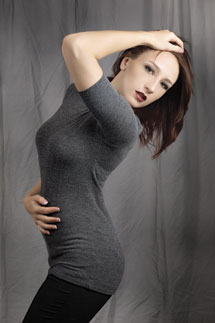
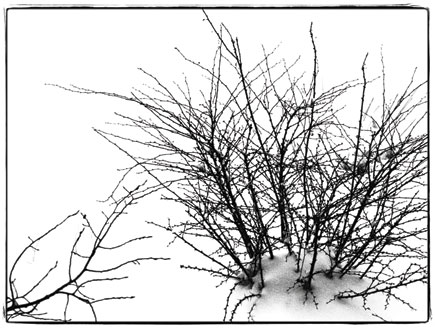
Grainy Film: This recreates the grainy look and high-contrast tonality of certain black and white films and produces images with a decidedly dramatic feel. This is a great effect for studio and fashion photography as well as adding a gritty reportage look to street photography.
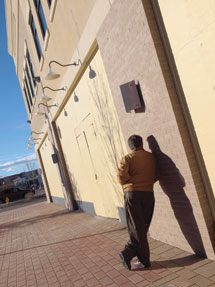
Pin Hole Camera: This filter reproduces the color tone and the peripheral vignetting of photos made with a toy camera, so it’s really more of a digital Holga effect than a true pinhole. The illustration was, for example, made at an aperture of f/7.1 while my Zero Image (www.zeroimage.com) pinhole camera has a standard aperture of f/256 or thereabouts.
 |
|
|
In Live View mode you can see the effect of a particular filter before capturing the image, making it easy to apply the right filter to the right subject. Only one Art Filter can be applied to an image at the time an image is captured. The most important thing to remember about the Art Filters is that the examples you see are just suggestions using the kind of subject matter I photograph. You may find other subjects that will be enhanced with one of the Art Filters and when doing your own explorations, look beyond the obvious. With contrasty subjects, the Grainy Film Art Filter, when deliberately overexposed, can take on the look of a photograph made using Kodalith in the traditional darkroom.
 |
|
|
The Raw Facts
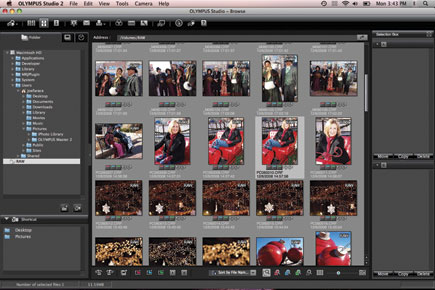
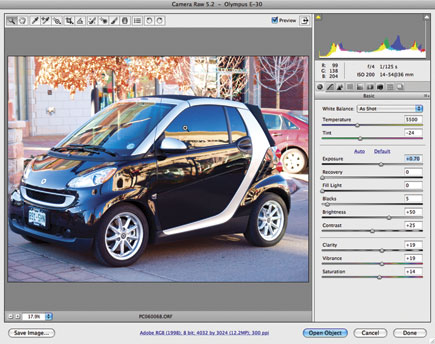
Using Art Filters with raw+JPEG capture is the best way of assuring that you have both an original, untouched file and a manipulated file. Sure it will eat up more memory card space but the E-30 does have twin card slots, one for CompactFlash and another for xD-Picture Card. You cannot, alas, record raw files to one card and JPEGs to the other as you can with Canon’s EOS-1D Mark II N and later pro-level D-SLRs. Olympus provides its Master software for conversion of .ORF files but make sure you update to Version 2.11 or later to be able to read raw files from the E-30. Olympus also includes a trial version of Studio on the CD that you can upgrade for $99 to get the more advanced features this software provides. Try it. You may like it.
Photoshop CS4 and Adobe Camera Raw (ACR) 5.2 (the latest version as I write this) read the E-30’s raw files although it is not yet officially supported by Adobe. Olympus advises that .ORF files produced via ACR 5.2 won’t be as sharp as they should be and many of the image’s tones will be slightly muted. This will change with the next release of ACR that should fully support E-30 files. In the meantime, Olympus Master software will produce crisper images and more of what you should expect from the E-30.
 |
|
|
Tip: The Adobe Camera Raw 5 plug-in is not compatible with versions of Photoshop earlier than Photoshop CS4 or versions of Photoshop Elements before Photoshop Elements 6.
Multiple Exposures
Long one of the holy grails of D-SLRs, the ability to capture multiple exposures on a single frame has started to pop on a few digicams but as Carly Simon sang, “nobody does it better” than the E-30. Making multiple exposures is simple: you select Multiple Exposure from the Capture 2 menu, which gives several choices and options. The first is the number of frames in the exposure; you can select two, three, or four. But it’s the next feature that’s the kicker. Auto Gain automatically adjusts the brightness of each image to ensure the final frame is properly exposed. In the old days of film, we would divide the ISO by the number of exposures and set that to get an approximately correct exposure; Auto Gain does this automatically and accurately.
 |
|
|
 |
|
|
|
| |||||||||


![]()
Get the Latest Photo Tips, News & Reviews from Shutterbug!
| Camera Reviews Other Reviews | Mobile Reviews Photography Reviews Columns | News | Features | How-To | Resources |
 © 2026 Shutterbug
AVTech Media Americas Inc., USA
All rights reserved