- REVIEWS
Camera Reviews 
More Reviews Mobile Reviews Photography Reviews - GALLERIES
- VIDEOS
- BUYER'S GUIDES
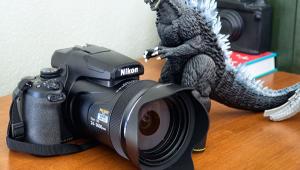
Canon PowerShot G12; The “G” Series, Amended
In the report on the Canon PowerShot G11 (April, 2010, available at www.shutterbug.com) I concluded by saying that it was “an excellent traveling companion.” Ditto on the new G12 ($499, MSRP), the latest iteration of the Canon “G” line of integral lens cameras aimed at the photo enthusiast. In fact, you could ditto many of the form, function, and features of the G12 with the G11, so I will not repeat those and refer you to the previous article for the specs. However, this is a camera legacy that deserves respect, as it comes close to being the “second” camera many seek (without an interchangeable lens), although it must be said that the G line may feel the heat from some compact system cameras where lens interchangeability and compact size are inherent charms.
 |
|
|
|
 |
While many of the features of the G line remain intact, the G12 offers some new goodies, including 720p HD video, which in some camera lines justifies a change in and of itself; various aspect ratios, which are pretty much in-camera crops with accompanying loss of file size; a front dial control, which is very useful for changing aperture, shutter speed, etc. and when shooting in Manual mode; a hybrid Image Stabilization (IS) setup, useful for close-ups; compatibility with the new SDXC cards; and some additional Scene modes.
Do these changes justify a new model? Probably so, competitively speaking, but if I were a G11 owner I would not toss it and rush out and buy a G12. But having worked with the G12 for a few weeks on a trip to New Mexico, I still hold that the G-line cameras (models 10 and up) are an excellent choice for travel or a second camera. What follows are some notes on some of the new items, and comments on how a camera like this can satisfy shooters who like to get their hands into their images, so to speak.
|
ND Filter
|
|
 |
|
|
The first step in working with the G12, if you haven’t worked with a G-line camera before, is in understanding how to move in and through the setup and exposure menus. In the past you could find a shady spot and, holding camera in hand, browse through the instruction manual. Alas, there is no manual in the box, except on the included CD, a move that could be seen as “green” or as a pain in the neck. This is one change from the G11 that I do not like.
In any case, the basic modus operandi is three buttons, a toggle dial, and a front control dial. The DISP button offers various viewing and read-out options as you shoot and review. The screen is fully articulating, which means that you can shoot from creative and new angles not available with a fixed monitor. The eye-level finder, by the way, is fair at best, and only offers a 77 percent field of view, with no read-out info, something I must say that even EVF finders, with their fairly poor visibility, top. Luckily the LCD is bright and snappy, although when wearing polarized sunglasses the vertical orientation goes blank.
Optical Scene Modes
|
ND Filter
|
|
 |
|
 |
|
|
|
“Miniature”
|
|
 |
|
 |
|
|
The MENU button is really for camera setup while the FUNC button is where all the action is, at least in the field after you have prepped the camera. This you use to change all the image size and format settings (JPEG and Raw), white balance, flash exposure compensation, ND filter selection, bracketing setup, and more. If you want to know the options the camera offers this is the first place to explore.
|
| |||||||||


![]()
Get the Latest Photo Tips, News & Reviews from Shutterbug!
| Camera Reviews Other Reviews | Mobile Reviews Photography Reviews Columns | News | Features | How-To | Resources |
 © 2026 Shutterbug
AVTech Media Americas Inc., USA
All rights reserved