- REVIEWS
Camera Reviews 
More Reviews Mobile Reviews Photography Reviews - GALLERIES
- VIDEOS
- BUYER'S GUIDES
Surprise! The Dehaze Slider Helps Find & Fix Dust Spots You Missed (VIDEO)

Ugly Dust Spots can really spoil a photo, whether they're caused by a dirty lens or a sensor that's overdue for a cleaning. Unfortunately, conventional post-processing repairs don't always do a perfect job—especially when the artifacts are difficult to notice at first glance.
This Lightroom quick tip demonstrates a unique way to use the powerful Visualize Dust Spots tool in tandem with a seemingly unrelated tool to find ALL the ugly distractions that need to be removed from a photo. The surprising method demonstrates why Lightroom's Dehaze slider is an ideal complement to the existing Visualize Spots slider when using the Healing Brush to get the job done.
Landscape photographer Pablo Garcia is one of our new go-to sources of fast, easy, and effective image-editing techniques that are accessible to novice Lightroom users. In this episode he demonstrates how to resolve the common task in less than five minutes so you can rid photos of dust forever more.
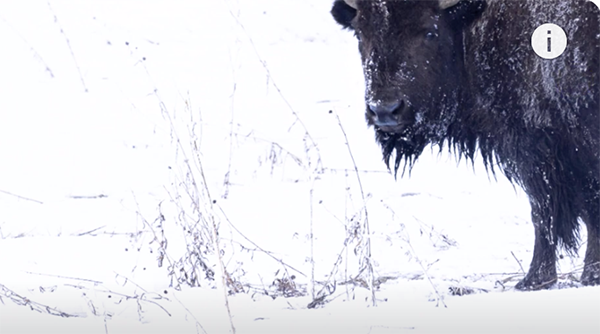
Garcia captured his first example—a snowy high-key image of a bison in Yellowstone National Park—and he says, "At first I thought I was basically done." But then he pulled Lightroom's Dehaze slider all the way to the right, and he began to see dusty areas he failed to catch when first examining the photo with the standard Visualize Spots slider. This is a key observation if you intend to make big prints.
Here's Garcia's explanation: "Using Dehaze works really well to boost contrast in photos with seamless, smooth backgrounds." He explains why he doesn't recommend limiting your spot removal effort to this simple adjustment, but rather calling on Lightroom's Visualize Spots slider as well to locate the artifacts. Then it's a very simple task to achieve a super clean photo.
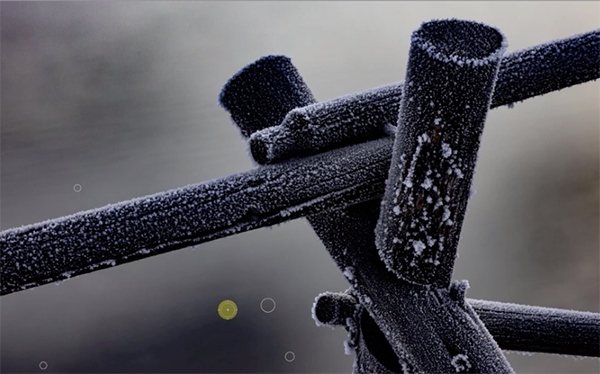
Garcia's second example is a much different type of shot, but it also has what appears to be a smooth featureless background—this time it's light gray instead of white. But once again, by boosting Dehaze to increase contrast there are noticeable spots that need to be removed.
You'll see a couple more images, each with a different look, and they're all significantly improved by the simple step-by-step method that Garcia recommends. In all cases he started his edit with the Visualize Dust Spots tool, following by the Healing Brush to eliminate obvious problems, while missing quite a few spots.
He also discovered other unwanted small elements in the scene once the Dehaze tool came into play. Here's a very important reminder when taking this approach: When you've located all the spots and cleaned up the image, don't forget to reset the Dehaze slider to the default neutral position.
There's much more to learn on Garcia's informative YouTube channel, so be sure to pay a visit.
We also recommend watching a tutorial we posted recently from another image-editing expert who demonstrates how to rehabilitate underexposed landscape photographs with a bit of help from Lightroom.
- Log in or register to post comments


![]()
Get the Latest Photo Tips, News & Reviews from Shutterbug!
| Camera Reviews Other Reviews | Mobile Reviews Photography Reviews Columns | News | Features | How-To | Resources |
 © 2025 Shutterbug
AVTech Media Americas Inc., USA
All rights reserved