- REVIEWS
Camera Reviews 
More Reviews Mobile Reviews Photography Reviews - GALLERIES
- VIDEOS
- BUYER'S GUIDES
How Lightroom's AUTO Settings Can SAVE Your Photos (VIDEO)

Here's an eye-opening tutorial from one of our favorite landscape photographers for those of you who struggle when processing images in Lightroom. It's all about how Lightroom's Auto Settings can set you up for refining a shot further and can even "save your photos."
German pro Christian Mohrle has a portfolio full of absolutely spectacular landscape photos, and he's just as good behind the computer as he is in the field. If you've watched his lessons in the past, you know that he takes a two-step approach when processing his work. He first makes basic adjustments to the image as a whole so it's as good as possible for the selective edits and masking that follow.
The point of today's episode is to help you achieve the optimum "base image" using Lightroom's Auto Settings. In some cases, the result maybe be perfectly fine without further editing, but if more needs to be done this initial approach will greatly simplify any steps that follow.
Mohrle walks you through the simple process in just 12 minutes while demonstrating the further refinements he made to transform a really good sunset scene into a great one. We suggest downloading his Raw file with the link beneath the video so you can follow along and makes the changes yourself as they're explained.
He admits that "I was struggling a lot and didn't know what to do with the shadows, the sky, and the forest on the right side of the frame." Mohrle tried several of his go-to basic adjustments, all of which proved unsatisfactory, at which point Lightroom's Auto settings came to the rescue.
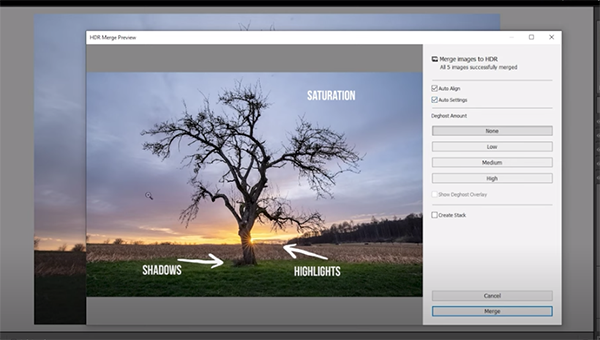
Mohrle's photo was part of an HDR sequence and you'll see how the individual shots were merged as a prelude to describing the way Auto settings work and how to apply them for maximum effect. By checking the Auto Settings box in the Photo Merge window the image is instantly much improved with greatly restored highlight and shadow detail—even before clicking on the Merge button.
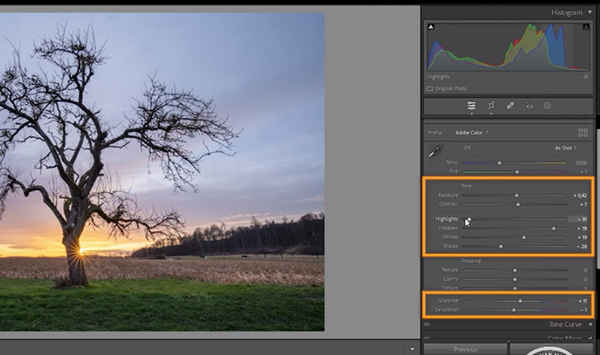
According to Mohrle, this is what happened: "What Lightroom tries to achieve with these Auto settings is it wants to create a balanced exposure with better contrast." To illustrate how this happens he opens the Basic panel so you can see every adjustment that was automatically applied.
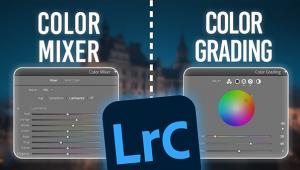
If all an image needs are adjustments to these common parameters, well, you can call the job done. But sometimes a few more enhancements are necessary if perfection is your goal. To that end, Mohrle moves on to straightforward masking, color grading and sharpening. Take a look at his before/after images and you'll be impressed.
Then head over to Mohrle's instructional YouTube channel where you'll find much more of interest for shooting in the field and editing images in Lightroom or Photoshop. And don't miss the related tutorial we posted with another top pro, explaining how to shoot and edit HDR photographs for perfect exposures every time.
- Log in or register to post comments


![]()
Get the Latest Photo Tips, News & Reviews from Shutterbug!
| Camera Reviews Other Reviews | Mobile Reviews Photography Reviews Columns | News | Features | How-To | Resources |
 © 2025 Shutterbug
AVTech Media Americas Inc., USA
All rights reserved