- REVIEWS
Camera Reviews 
More Reviews Mobile Reviews Photography Reviews - GALLERIES
- VIDEOS
- BUYER'S GUIDES
How to Create Pro-Quality B&W Photos in Lightroom (VIDEO)
Sometimes you shoot a color image and realize it would look more compelling by converting it to b&w because of the potential for awesome contrast and other characteristics within the scene. Today you'll learn why you should avoid the common amateur approach, and use a method favored by a top pro that is still simple to accomplish.
Instructor Doug Hall is an Australian professional who says, "I love b&w photography," and credits his compelling imagery to the fact that he's a very accomplished visual storyteller. In this 10-minute episode he urges you to avoid the easiest method of converting color photos to b&w, and Hall demonstrates the much more effective (and still very straightforward) approach he uses in Lightroom to get the job done.
The easy way out, typically employed by inexperienced Lightroom users, is just clicking on the Desaturate and then grabbing your morning cup of coffee. That's about as fast as it gets, but there's a much better way if you're interested in superior results.
Hall's method isn't the only option available but it works really well to tailor the effect to a specific image. By following his advice you'll be able to imbue the conversion with whatever style that you prefer. Hall pulls up a colorful portrait and illustrates how it looks after using the one-click "amateur" approach. Then he compares the uninspiring result to the same photo converted with his professional technique.
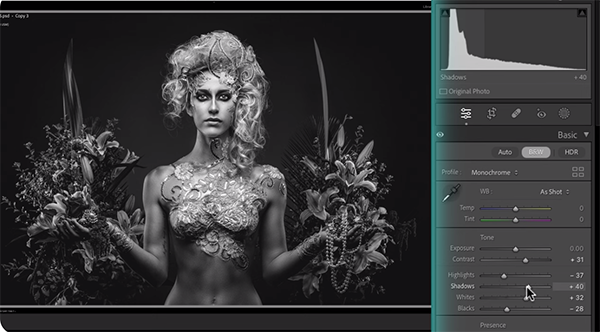
Hall first duplicates the image because he never works on originals. He then takes the amateur version and makes a few minor adjustments in Lightroom's Develop module to the image as a whole. The color version was already edited so there's not much to do other that boosting contrast, dropping highlights, increasing Texture and Clarity, bringing up shadows, and modifying blacks and whites.
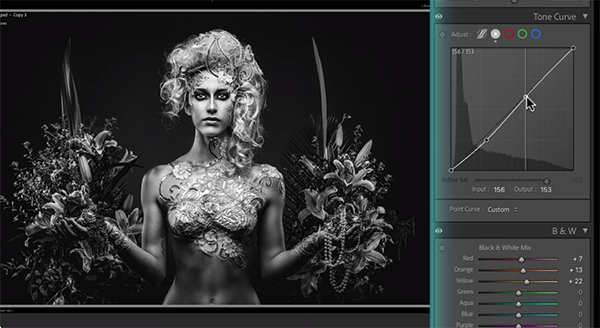
The image now looks much better, but there's more work to do. Halls jumps to the B&W Mix panel and uses simple sliders to adjust the tones of various colors. Now it time for Curves adjustments and a bit of Dodging and Burning that enhance the shot even further—paying particular attention to skin tones, edges, details and "muscle tone."
The transformation is now complete, and if you compare the amateur and pro versions we're confident of this: if you make b&w conversions it pays to spend a few minutes to get the job done right. There's much more to learn on Hall's instructional YouTube channel so be sure to pay a visit.
We also encourage you to watch the tutorial we posted with another serious pro, explaining a new way to eliminate noise from all the photos you shoot in the great outdoors.


![]()
Get the Latest Photo Tips, News & Reviews from Shutterbug!
| Camera Reviews Other Reviews | Mobile Reviews Photography Reviews Columns | News | Features | How-To | Resources |
 © 2026 Shutterbug
AVTech Media Americas Inc., USA
All rights reserved