HDR Express: Simplified Merge To HDR From Raw, TIFF, Or JPEG
The merge to HDR process has for too long been a mystery wrapped inside an enigma. That cloak of mystery is one giant step closer to being removed thanks to HDR Express, from Unified Color Technologies (www.unifiedcolor.com). While this software greatly simplifies the process, successful HDR merges don’t just happen when you click a button. There is some planning involved.

You start by capturing a sequence of images at the camera (or manually) metered exposure. My Nikon D300 simplifies the procedure by letting me set the number of exposures and exposure compensation increments for auto-bracketing, with the camera set for sequential shooting (preferably high speed, to circumvent unforeseen intrusions). Auto-bracketing should go plus (overexposed) and minus (underexposed) on either side of that initial exposure. The bracketing range may extend up to nine exposures, particularly for extreme contrast scenes, in one-stop increments.
Start Here
© Jack Neubart
Granted, shooting nine exposures consistently does eat up lots of space on a memory card and hard drive, but it also guarantees that you have the needed tonal range to work with. You can always drop frames before sending the images to HDR Express, when they’re not needed or suitable (say someone walks into the shot), but you can’t add exposures after the fact. That said, sometimes I will shoot multiple sequences to ensure I can fill in the gaps where necessary.
Tone Presets & The Interface

Photos © Jack Neubart
Style Presets
![]()
On the other hand, to minimize “ghosting,” which manifests itself as doppelgängers or overlapping multiple personalities of moving subjects (such as people, traffic, or leaves blowing in the wind), consider limiting yourself to three, four, or as little as two (one under plus one over) exposures with scenes of moderate contrast. HDR Express manages to pull out considerable information from those few exposures as well.
Handheld Merge To HDR: A Neighborhood Park


HDR Express primarily examines the EXIF data and looks for incremental changes in shutter speed. Hence, shoot in Aperture Priority or Manual mode, keeping the aperture constant so as not to shift depth of field, at a constant ISO. If you use even two frames with the identical shutter speed, HDR Express will return an error message. Also, as I’ve found out, bracketing TTL flash output as the only variable will not work for the same reason—you’ll also need to bracket shutter speeds.
One more thing: use a tripod or other solid support, so frames remain consistently aligned. The program will align images—up to a point, but this puts you on firmer footing from the get go. Having said that, you can achieve some success using HDR Express to merge handheld images, but I would keep to a maximum of three frames to ensure alignment.
HDR From Raw Vs. TIFF

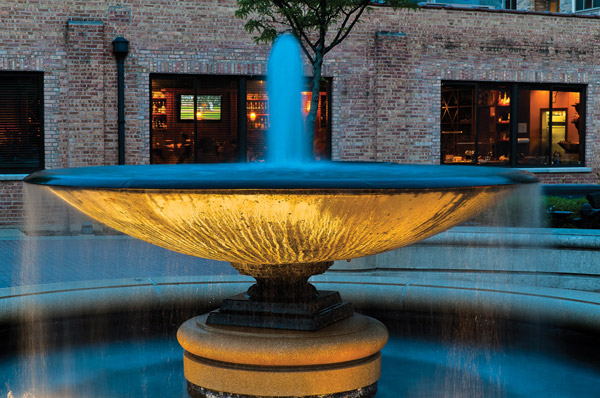
Photos © Jack Neubart
You can work with HDR Express as a stand-alone application or as an Adobe Lightroom or Apple Aperture plug-in. I took the Lightroom route. HDR Express will automatically generate a file name that reflects the range of images used for the merge, for example, hdr-8505-8513 (or you can modify the file name), and places the exported image within the original group of images, making it readily available to Lightroom.
You can export as an 8- or 16-bit TIFF or 8-bit JPEG sRGB, Adobe RGB, or ProPhoto RGB file. Additionally, there is an option to save a native 32-bit BEF file in Unified Color’s Beyond RGB color space. You can later return to this BEF file in HDR Express to make any needed changes. (For more on Beyond RGB, see sidebar below.)
Ghosting: View From Museum Campus, Chicago
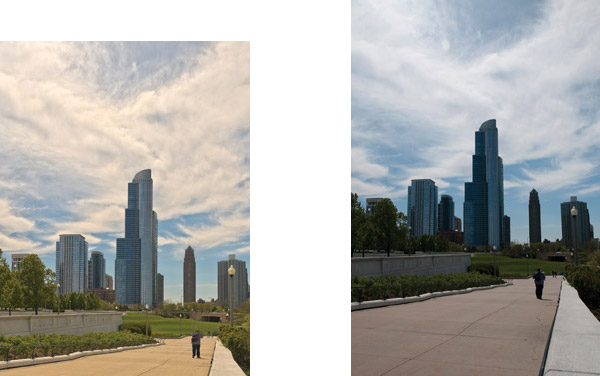

Photos © Jack Neubart
Exporting To HDR Express—And Back Again
You can export images out of Lightroom to HDR Express in one of two ways. Exporting Raw files vacates any and all Lightroom adjustments. But you can now draw upon every bit of information within that file, as with any Raw file being processed. You alternately can opt to export with Lightroom adjustments. That transparently converts each file to a TIFF (you see this in the opening dialog box), but these TIFFs are later deleted from the drive, leaving no trace. An added benefit to working within Lightroom is that when the merge to HDR process completes, HDR Express automatically exits. (When you work with HDR Express as a stand-alone app, a dialog box asks you to select images to merge.)
If you feel strongly about making corrections governing lens aberrations, transforming the images and cropping them, and making other changes, then your only route is to use TIFF or less desirable JPEG files that contain these tweaks. But keep in mind that this severely limits the program’s capabilities to deliver an optimum HDR product, especially if you’ve downgraded the image to 8-bit color depth. The resulting image could reflect distorted tones (although they can sometimes be interesting). But worse, you may find artifacts, such as increased luminance noise and halos (bright outlines around subjects of contrasting darker tone adjacent to highlight areas).
Fountain With Fill Flash

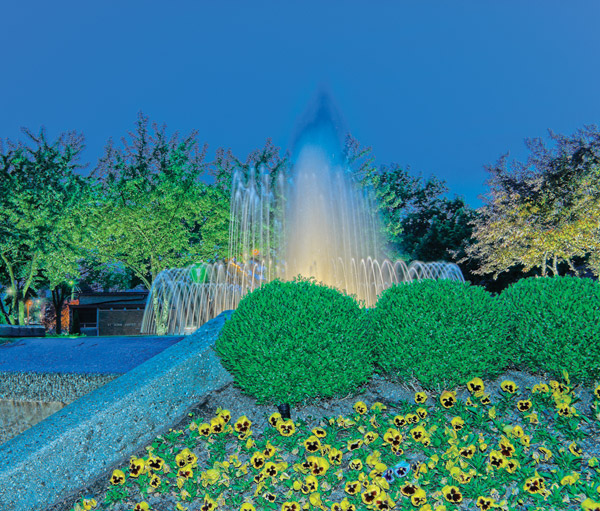
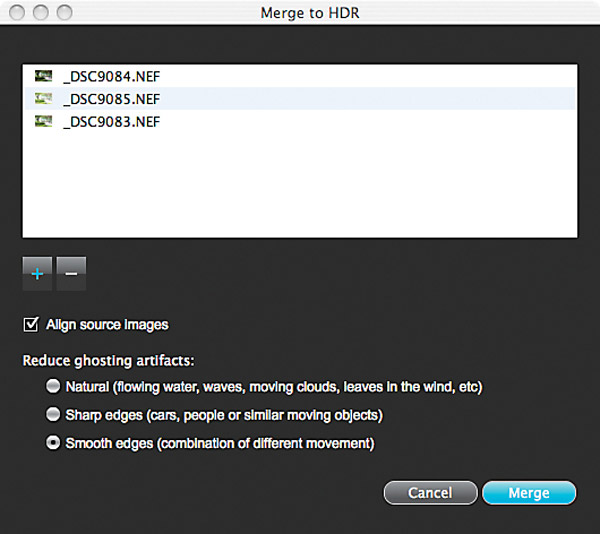
A key option at the outset is choosing to let the program align images. I’m told that, unless you’re focusing on motion within the scene, you should leave this box checked off (the default) so images are in register for the merge process.
Next we deal with ghosting (that doppelgänger effect I mentioned earlier). You can direct HDR Express to prioritize different kinds of incidental movement in an attempt to minimize ghosting, by selecting one of three options (they’re explained in the dialog box). While the program’s efforts at controlling ghosting are commendable, they don’t seem to go far enough. In the end I felt most comfortable defaulting to the “Smooth edges” option as the best of all worlds.
In some instances, you can retouch out the ghosting; in others, you’ll just have to live with it. My advice: use fewer images, get fewer ghosts.
Tone Mapping In HDR Express
The next step is tone mapping. HDR Express maps the merged HDR images into five preset tone maps, ranging from shadow to highlight priority. If these are not to your liking, there is an adjacent panel with user-definable parameters. And beyond that are preset styles that give the image more character. Be careful, as clicking on any preset will override some or all slider settings you may have made (depending on the preset). I’ve found that the best option is to first save your custom settings as a user preset style. Then play around with the other styles and sliders or choose another tone map (you can easily navigate back and forth). You can then return to your user-defined style.
The user parameters are limited to an essential few, enhancing the workflow. There’s even a white balance color picker, and a histogram that reveals highlight and shadow clipping (yes, even merged HDR images exhibit some clipping—leave a little for taste). The key is to make as many adjustments as possible here before exporting.
HDR Express does indeed make the merge to HDR process largely painless. In fact, I was pleasantly surprised by the simplicity of the whole process. And I was impressed that HDR Express pulls information out of Raw files, delivering much deeper and truer color content than from TIFFs.
Foibles? Yes, there are a few. One is ghosting, which I feel could be better handled. Another is the addition or exacerbation of color fringing in some HDR images, which was easily correctable. And it turns out that HDR Express minimizes metadata when exporting. More to the point, that means that when you apply lens profiles in Lightroom or elsewhere, you will have to select the lens manually.
That aside, most dramatic of all—and the raison d’être for merge to HDR—is the way HDR Express handled extremely high contrast scenes. No amount of adjustments in any digital image processing application alone could draw out as much detail as HDR Express delivered. It was literally an eye-opener.
(Sidebar) Beyond RGB
Unified Color’s John Omvik explains: “The benefits are that you are transforming the HDR image to a 32-bit floating point representation in a color space designed for HDR, based on human vision. It has no out-of-gamut colors or device limitations that the other color spaces have. Beyond RGB separates color from brightness information (the b axis in BEF stands for brightness and the e and f axes are for color). This allows us to make brightness and contrast adjustments to the image solely on the brightness channel without affecting any of the color channels in the image. Since so much of what you do in HDR involves contrast adjustments, this allows us to create the most natural-looking HDR images without color shifts. By the same token we can operate on color without changing the brightness or contrast of the image.”
System Requirements, Free Trial, And Pricing
PC: Windows XP, Windows Vista (for 20 MP image or larger, 64-bit Windows version is recommended), 2.0GHz dual core minimum, 2GB RAM (4GB recommended), 128MB video card memory.
Apple: Intel Macintosh 2.0GHz dual core CPU with 2GB minimum RAM (4GB recommended) running Mac OS 10.5.8 (Leopard) or Mac OS 10.6.4 (Snow Leopard), or later.
Free 30-day trial; purchase price: $99, for Mac or Windows—via online download from Unified Color Technologies (www.unifiedcolor.com).


