- REVIEWS
Camera Reviews 
More Reviews Mobile Reviews Photography Reviews - GALLERIES
- VIDEOS
- BUYER'S GUIDES
Handcolor Your Prints
A Venerable Craft That Is Still Going Strong
From the mid-1950s to the
mid-1980s, handcoloring was associated mainly with the days before color
film. But it has never really gone away. Handcoloring is far from new:
handcolored daguerreotypes survive, as do tintypes. Long after color
processes appeared in the first decade of the 20th century (Lumiere
Autochrome), handcoloring remained the cheapest and easiest way to get
a colored print. Then, as color films and color printing became more
affordable, handcoloring languished; as eventually did black and white
photography. Not until the 1980s did black and white photography become
fashionable again, and so in due course did handcoloring. |
|||
Getting Started Paper Surface Options Printing For Handcoloring Tools And Techniques
Of The Craft |
|||
Handcoloring Pencils,
Too Color Mixing |
|||
Extender and Drier Keeping "Du-Tubed
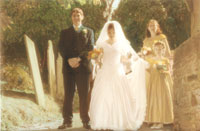
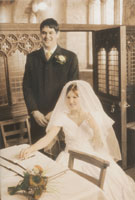
Colors" The Handcolored Wedding Handcoloring Kits Manufacturers/Distributors Cachet/Fappco (Maco) Luminos Photo Paterson Photographic Inc.
(USA) |

- Log in or register to post comments


![]()
Get the Latest Photo Tips, News & Reviews from Shutterbug!
| Camera Reviews Other Reviews | Mobile Reviews Photography Reviews Columns | News | Features | How-To | Resources |
 © 2024 Shutterbug
AVTech Media Americas Inc., USA
All rights reserved