- REVIEWS
Camera Reviews 
More Reviews Mobile Reviews Photography Reviews - GALLERIES
- VIDEOS
- BUYER'S GUIDES
Lesson Of The Month
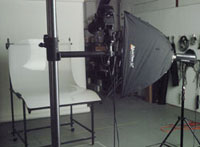
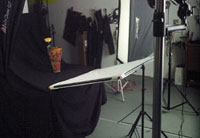
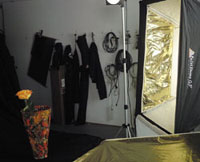
Lighting To Enhance Saturated Colors
The following step by step procedures and instructions are intended to assist you in obtaining the best possible film scans based on one basic principle: Every film image is unique. Therefore, the specific parameters of adjustment for every scan you make will be different. Although most contemporary scanners which support film scans offer various kinds of automated scan adjustment, all are based on the premise that every photographic subject image can be treated the same way. This limited approach is easy and convenient. It does not assure that the optimum adjustment for the highest fidelity of image reproduction based on the specific characteristics of the subject and the conditions under which it was photographed will be considered and incorporated into the scanner's image data processing. Even so, you do not have to give up all of the convenience of automation. You can use the following procedure steps to check what the automation has done and then make just the adjustments that are needed to accommodate the unique attributes of an image when necessary. How A Scanner Works. The fundamental parts and functions of a scanner are really quite simple. The active imaging part is a triple line of CCD sensors. There is a light source on the opposite side of the film plane, as well as a lens between the film plane and the CCD linear array. The film passes by the CCD array on a carriage in a film scanner, or the light source/linear CCD and lens assembly move along the length of a flat-bed scanner, both transported by a finely threaded rod turned by a step motor. At each step the linear CCD array reads the value of the light passing through the film and focused upon it, recording one line of RGB pixel information. When the scan is completed its line-by-line gathering of information is compiled by the scanner firmware (code on a chip in the scanner) and transferred to the driver software application running on the host computer. In the scanner driver interface the preview image of a scan is a low-resolution picture of what the scanner collects as raw RGB data from the CCD array. It is the automatic or manual software adjustments provided within the scanner driver software that interprets this raw data to result in a final scan that is transported to an application or saved as an image data file. So, essentially what the scanner does physically is always the same regardless of what kind of film and what characteristics are inherent to the film image. It is the driver software that defines how that raw RGB information should be interpreted. What follows is a step by step procedure that allows you to take control of how that interpretation is made. Scan Adjustment Order. There is a very strict functional requirement to follow a specific order of progression making scan adjustments. The first thing to do is fit the image information portion of the raw scan data (gamut) into the output image space. Most contemporary scanners record data from the CCD array at 12-bit depth per RGB channel, or 36-bit color. This is a deeper bit depth than what is supported by standard personal computer applications and devices, which is 8-bits per RGB channel or 24-bit color. There is an advantage in this depth difference between raw scan data and the depth of a standard computer RGB color image file. |
|||
Many film images when scanned with only an adjustment to map the raw data image information to the full gamut of the 8-bit per RGB channel depth, reproduce the overall image brightness too light or dark. There may be a large part of the image information concentrated in just the shadows or highlights. Adjustments to the placement of the levels of tone to effect lightening or darkening of the whole or part of the image thins the information depth in one part of the image and compresses it another. But, when the 12-bit data is translated as part of the final scan to 8-bit data there is very limited or no loss of image information. This is why it is so extremely important to make all of the image adjustments possible with the scanner driver based on the preview so the final scan will not require any post-scan adjustment, which would be at the expense of lost image data. Scan Adjustment Step No. 1: Fitting the image gamut of a raw scan into the 8-bit per RGB channel space is sometimes referred to as "equalization," a function that is referred to in Photoshop's Image/Adjust tools as Levels. The tools provided to accomplish equalization in scan driver software vary, but often include an eyedropper to identify and select the highlight and shadow level in an image. The procedure is to click on the eyedropper for highlights and then move the screen cursor to the preview image to carefully place it in the brightest highlight. Then repeat the procedure selecting the shadow eyedropper moving the cursor to the darkest shadow in the image and click on it. With some scanner drivers a histogram graph will be provided accompanying the use of eyedroppers, and the selection points will be indicated by small triangles or arrows under the graph. Others, like Epson TWAIN Pro, set the level of a slider that also has a number value readout. In either case you can adjust the setting to include more of the raw data gamut if the eyedropper selection clips into it too far so you would lose shadow or highlight information in your final scan. On the other hand, a few images, like a portrait with a white background, may require clipping further into the highlights to render the white as brightly as desired. Scan Adjustment Step No. 2: Once the image is optimized to fit into the 8-bit output space used by a computer application, the second adjustment that should be done before a final scan is initiated, is to adjust either the overall brightness if necessary, or adjust the relative brightness of one part (shadows) of the gamut relative to the whole. This is most effectively accomplished by a tool that reshapes the characteristic curve of the image. This is the function of the Curve image adjustment tool in Photoshop and is referred to in some scanner software as tone correction, tone adjustment, tone mapping, etc. Usually this tool provides a curve chart which characterizes the preview beginning with a straight line. An overall ellipse adjustment upward provides overall brightening, and downward darkening. Limiting redrawing the line to a curve along just part of the curve line corresponds to adjusting the brightness of just one part of the image, like just curving the bottom up to open the shadows while leaving the lighter image tones unchanged. |
|||
Scan Adjustment Step No. 3. Some film images require for one reason or another an overall or global shift in value. This kind of global color correction can be used to correct for photographs made in lighting that varies from the standard color temperature balance of the film used. Other film based causes can include a processing abnormality or a severe color shift due to age and film dye deterioration. The global color adjustment tool is also essential when there is no easily identified highlight in an image that should be neutral, precluding the use of an eyedropper to remove a color caste. It should only be used after both equalization and any curve adjustment needed has been applied. Scan Adjustment Step No. 4. Selective color correction was introduced to a broad audience with Photoshop Version 5, and is incorporated in the Image/Adjust/Hue & Saturation tool dialog. It has also been a part of professional-level scanning software for some time, and is now included in an increasing number of consumer film scanning packages. It is an extension of global color adjustment that supports selecting and limiting to just one segment of the color spectrum that can then be adjusted on the Hue, Saturation, and Lightness scale. The flexibility of HSL adjustment combined with being able to isolate the changes just to one segment of the color range in an image makes it more practically useful than even global color adjustment. The great majority of images that are scanned from film are usually of good quality, and of subjects with a more or less typical distribution of tones and colors. More often what is needed to make the scans of these majority images ideal digitally are minor adjustments of color once the basic parameters of equalization and curve tone adjustment are set. For instance a picture of a scene with a person in it may be well-balanced with a good overall color fidelity to the scene, but the person's complexion may look too pink and ruddy. Selective color adjustment allows first setting the dialog to only affect the warm reds, and then the hue can be shifted a little toward the yellow/green side, and the saturation can be reduced to make the complexion less flushed looking. Scan Adjustment For Color Negatives. Scanning color negative films can be an advantage because the density range of the image is lower, fitting into the dynamic range of the scanner readily, but also a disadvantage because the software processing by the scan driver software must eliminate the "orange" dye base color of the film. Most contemporary scanner software offers a selection of "film terms" or reference values for the interpretation of different brands of color negative film. However, I've yet to use a scanner which included film terms for but a few of the different color negative films I've used and attempted to scan. However, most scanner software includes a film term that is generic, but one which usually requires significant levels of adjustment to provide a neutral interpretation of the image information free of the influence of the color of the film's dye base. The solution is to use whatever facilities of adjustment the scanner software offers to compensate for the dye base as independently of the image contained as possible. A good test image to accomplish this would be a subject that contains only blacks, whites, and grays, preferably a gray scale. Then once the color only adjustments are determined which neutralize the dye base, they should be saved so they can be called up as needed as a starting point for adjusting scans of color images on that particular brand of film. |
|||
Now, we come to a completely different concept of the two of them. This time I wanted to show the brightly lit scene behind them: the garden area of the museum's atrium, featuring the statue that has become the symbol of Sarasota. Since detail in the background was important to the success of the photograph, my concept here was to expose for the background and bring the intensity of the light on them up to the brightness of the direct sunlight behind them (Photo 4). With the background selected, my next thought was what lens to use. I wanted to show the outdoor setting in its full glory and still keep the bride and groom as the center of attention. For me, this has always meant using a wide angle lens, keeping the subjects close to the camera. My choice, then, was to use my 40mm or 60mm lens. I figured that my 40mm lens would include too much behind them and weaken the image. I started with my 60mm lens, liked what I saw and left it that way. By this time, JJ had taken off his jacket and slung it over his shoulder. I left it that way and decided it would be a good change to have the contrast of his vest against his jacket to keep the attention on the two of them. |
|||
I first posed them out in the sunlight, but the sun was so bright, they couldn't keep their eyes open. I finally brought them into the shade of the overhang, backlighting them with a strong flash to give the idea that they were still being backlit by the bright sunshine. The next important thing was to establish camera position, so that their heads would be placed against a simple part of the background and the trees would not seem to be growing out of the back of their heads. I used my regular setting for bright sunshine outdoors--1/125 of a sec at f/16. I had the power of the flash brought up also to f/16. It was a done deal. The flash behind them, of course, once again matched the f/stop. At this point one of the photographers in the class asked how I would light a subject to show up someone with darker skin tones in a similar situation. There was hardly any difference (Photo 5). |
|||
The only difference, actually, was to position him so that the direct sunshine would be back and sidelighting his face. It was the same as if I'd had him in the studio and created a kicker light coming from the side and behind to create highlights on the side of his face. In this situation it was simple. The direct sunshine was coming from the other direction. I just turned to the left, posed him in a relaxed manner with his hand on the pedestal of the column and added the same strong flash to bring the light on the front of him up to the brilliance of the background. A Polaroid test print showed that I had "nailed it," so I switched over to regular film and took this portrait of him. I rated the Polaroid and the ISO 160 film at 125. Both films seem to work great at that setting. Finally, before leaving the grounds of the museum, I posed Danielle and JJ with the class behind them. I positioned my two co-instructors for that morning, Al and Estal, at the upper position on the staircase (Photo 6). |
|||
My 40mm lens was perfect for positioning the bride and groom less than 10' from the camera. The class participants were asked to scatter themselves on the steps and in the garden behind them. The bright sunshine lit the entire scene, even creating that important kicker light on the black man's face, below left. A strong flash close to the camera, balanced to the bright daylight behind them, brightened the shadowed side of their faces. The posing of the bride and groom seated on the steps was to allow them to be close to the camera without blocking all the people behind them. I liked the way her gown flowed down the staircase to create a nice base for the entire composition. A high viewpoint seems to work very well when seating the bride on the ground with her gown spread around her. Otherwise, had the camera been close to the level of the ground, you wouldn't have been able to get the effect of the gown's placement. After leaving Ringling Museum we went back to the Greek Orthodox church where I regularly hold my Florida classes. Again, working under the cover of a porch, I posed Danielle and JJ together in casual clothes (Photo 7). I used a long telephoto lens on my Hasselblad to show as little background behind them as possible. I actually worked in the corner of the covered area with soft light coming in from their left and from behind me. |
|||
The wall behind them was actually L-shaped. I positioned them slightly forward from the edge of the side wall, allowing light to split light their faces. Then, I added my Westcott Monte Illuminator/ Reflector on the same side from which the stronger outside light was coming from. I pointed the silver side almost all the way out to the outside, so that it could pick up light and reflect it back onto their faces. When the wind blew her hair across her face I took the picture, loving the naturalness of the outdoor wind-blown effect. From there I took Danielle out into the bright sunshine. I backlit her completely with the almost directly overhead sun (Photo 8). Ordinarily in a situation like this I would use a flash to open up the shaded side of her face, but she was able to keep her eyes open with my using the reflector. So, that's all that was used for this portrait. A single reflector balanced the light on her face to the bright, direct sunshine on the top of her head. My 350mm lens confined the background to just the plain wall, which was about 10-15' behind her. |
|||
Afterward, I photographed Danielle seated in another of my favorite areas for creating portraits--under a long, covered area in the front of the church (Photo 9). I brought her to where there was light coming just from her left. Again, I exposed for the ambient light with the bare bulb two f/stops under. Then, for some unknown reason I got the idea of building up the light on her a little more, while she was still seated in the exact same spot. I didn't do that by increasing the flash. Instead, I had someone hold my silver Monte Illuminator/Reflector just outside the arches. It picked up some bright sunshine and threw it directly onto her face, which brought the light on her up much closer to the value of the light in the background (Photo 10). |
|||
The lighting with the extra sunlight coming in from the reflector looked so beautiful that I decided to go just with the existing light and not use a flash with it. When I added that extra light onto her from the reflector, it brought her up closer to the brightness of the background. The new exposure made the background much darker. We all flipped out at the difference the extra light on her made in the final image. |


![]()
Get the Latest Photo Tips, News & Reviews from Shutterbug!
| Camera Reviews Other Reviews | Mobile Reviews Photography Reviews Columns | News | Features | How-To | Resources |
 © 2026 Shutterbug
AVTech Media Americas Inc., USA
All rights reserved