- REVIEWS
Camera Reviews 
More Reviews Mobile Reviews Photography Reviews - GALLERIES
- VIDEOS
- BUYER'S GUIDES
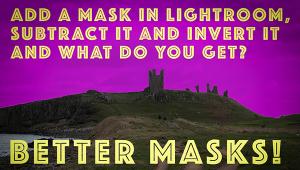
How to Edit Jpeg Photos If You Don't Want to Deal with Raw Files (VIDEO)

Most so-called "experts" capture images in the Raw file format because this approach provides far more control during post processing. Jpeg images, on the other hand, are a "lossy" compressed format that often results in image degradation that's particularly noticeable in areas with sharp edges and fine details.
So why do some photographers prefer capturing Jpeg photos? Well there are a number of common reasons. According to experts at Adobe, one consideration is this: "Jpeg files are a much more manageable size because the data they contain is compressed, and the camera's image processor has essentially developed the image already."
In other words these smaller files require far less storage space than their significantly larger Raw counterparts. Another consideration for photographers who only display their work online at 72dpi is that maximum image quality isn't really essential for this specific purpose. And some photographers simply don't want to spend time dealing with the perceived difficulties of developing their photos with a Raw editor.

The point of this tutorial from the NavEdits YouTube channel is that there are several methods for minimizing the limitations of Jpeg images, which can be particularly acute with photos shot and edited on mobile devices. In this episode you'll learn a few simple techniques for making Jpeg images look as good as possible. There's also an interesting trick for working with masking filters.
Instructor Nagesh Vasu is an image-editing expert who regularly posts tutorials for processing images with Lightroom on the desktop as well as using Lightroom Mobile to get the job done. Either way you'll learn how to create eye-popping photos when Jpeg is the name of the game.
Vasu walks you through his step-by-step process for enhancing Jpeg files in Lightroom, and they're so straightforward that we needn't summarize them here. So sit back, follow his advice, and you may be surprised and impressed by the fine results he achieves. Just click on the "Watch on YouTube" link in the window below to view the video.

Vasu's instructional YouTube channel offers a variety of helpful post-processing tips and tricks, so be sure to explore everything he has to offer for elevating your image-editing skills.
And don't miss the tutorial we featured recently from another Adobe expert who explains how to use Lightroom's powerful Lens Blur panel to achieve photographs with precise background blur and beautiful bokeh effects.
- Log in or register to post comments


![]()
Get the Latest Photo Tips, News & Reviews from Shutterbug!
| Camera Reviews Other Reviews | Mobile Reviews Photography Reviews Columns | News | Features | How-To | Resources |
 © 2024 Shutterbug
AVTech Media Americas Inc., USA
All rights reserved